
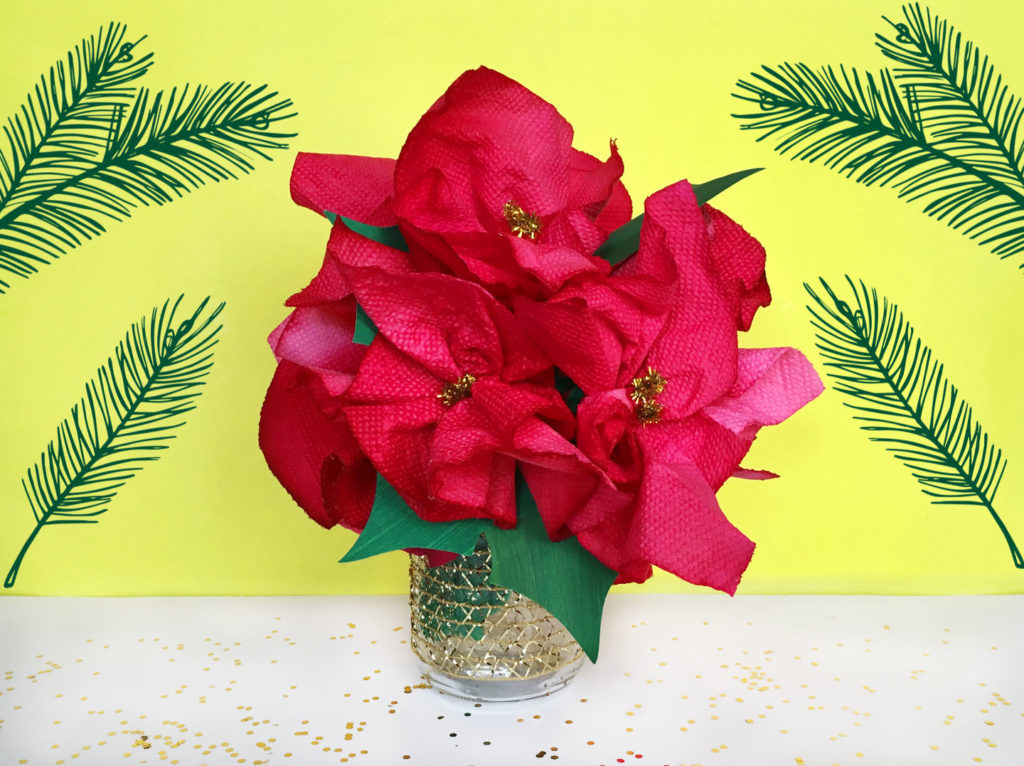
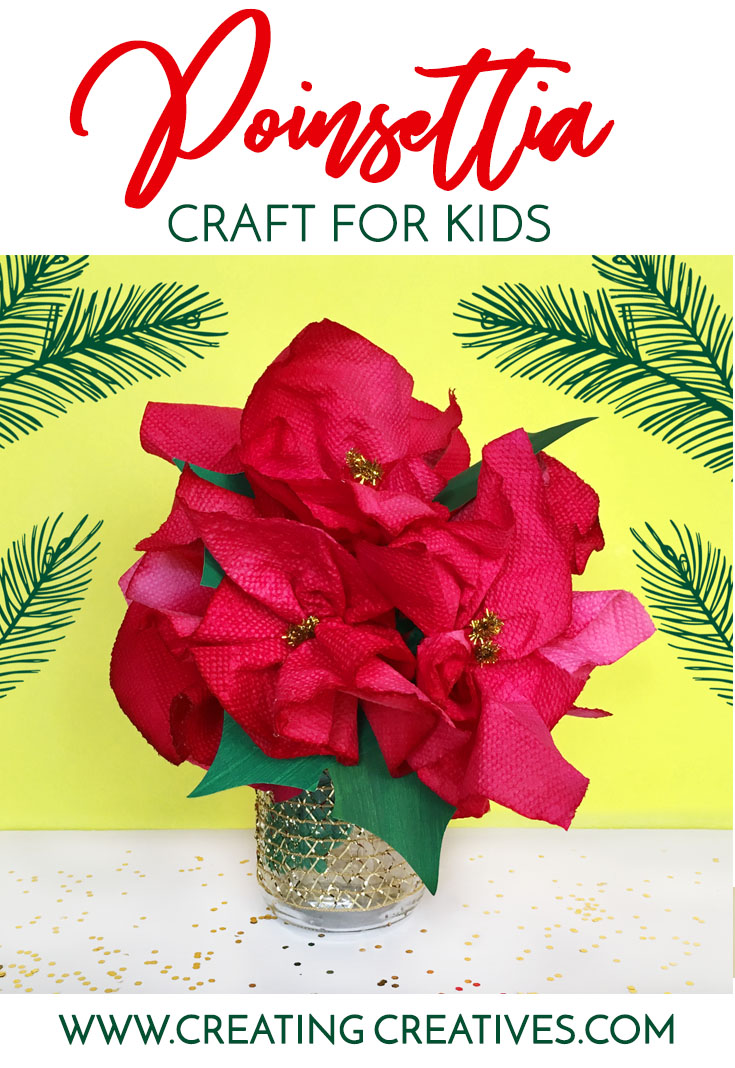
Poinsettia’s are one of my all time favorite flowers, probably because Christmas is one of my all time favorite seasons!
Over the summer we made some paper towel flowers inspired by a process we saw from the amazing Catalina over at Redviolet Studio. Catalina is the queen of process art, and is full of so many amazing and creative ideas as her Instagram feed shows. The process we tried was the process of dropping water colors onto paper towels or coffee filters. Well let me tell you, we gave this a go and my little creatives couldn’t get enough of it, we had paper towels for days!
The paper towels were so vibrant and beautiful I thought it would be fun to make a bouquet out of them, which we did and have kept in our craft room ever since. As I was moving things around for Christmas the other day I came across the bouquet and with my Christmas glazed eyes, I immediately saw how they could be turned into Poinsettia’s and so they were! Here’s how.
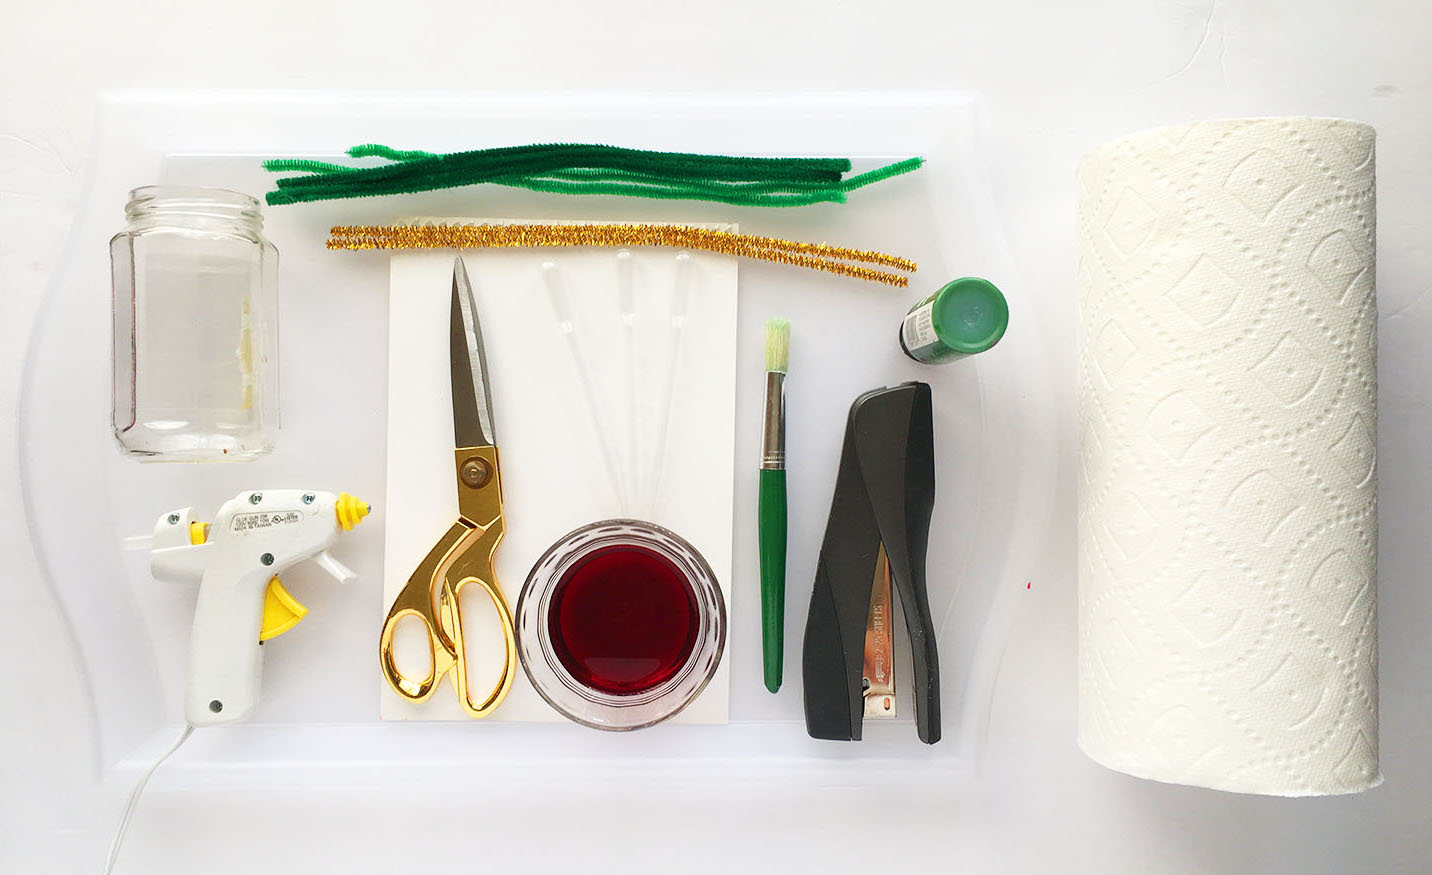
Poinsettia Craft Supplies:
 This list contains affiliate links.
- Paper Towels
- Red Liquid Watercolor (if you don’t have liquid water colors you could use food coloring in water)
- Containers for Liquid Watercolor
- Pipettes
- Paint Brush
- Green Paint (Optional)
- Green Pipe Cleaners
- Gold Pipe Cleaners
- Watercolor Paper or Green Cardstock
- Empty Jar or Vase
- Scissors (that can cut pipe cleaner)
- Stapler
- Hot Glue Gun
- Tray / Kraft Paper to dry
- Poinsettia Leaf Template – enter your name and email below and I’ll send you one 🙂
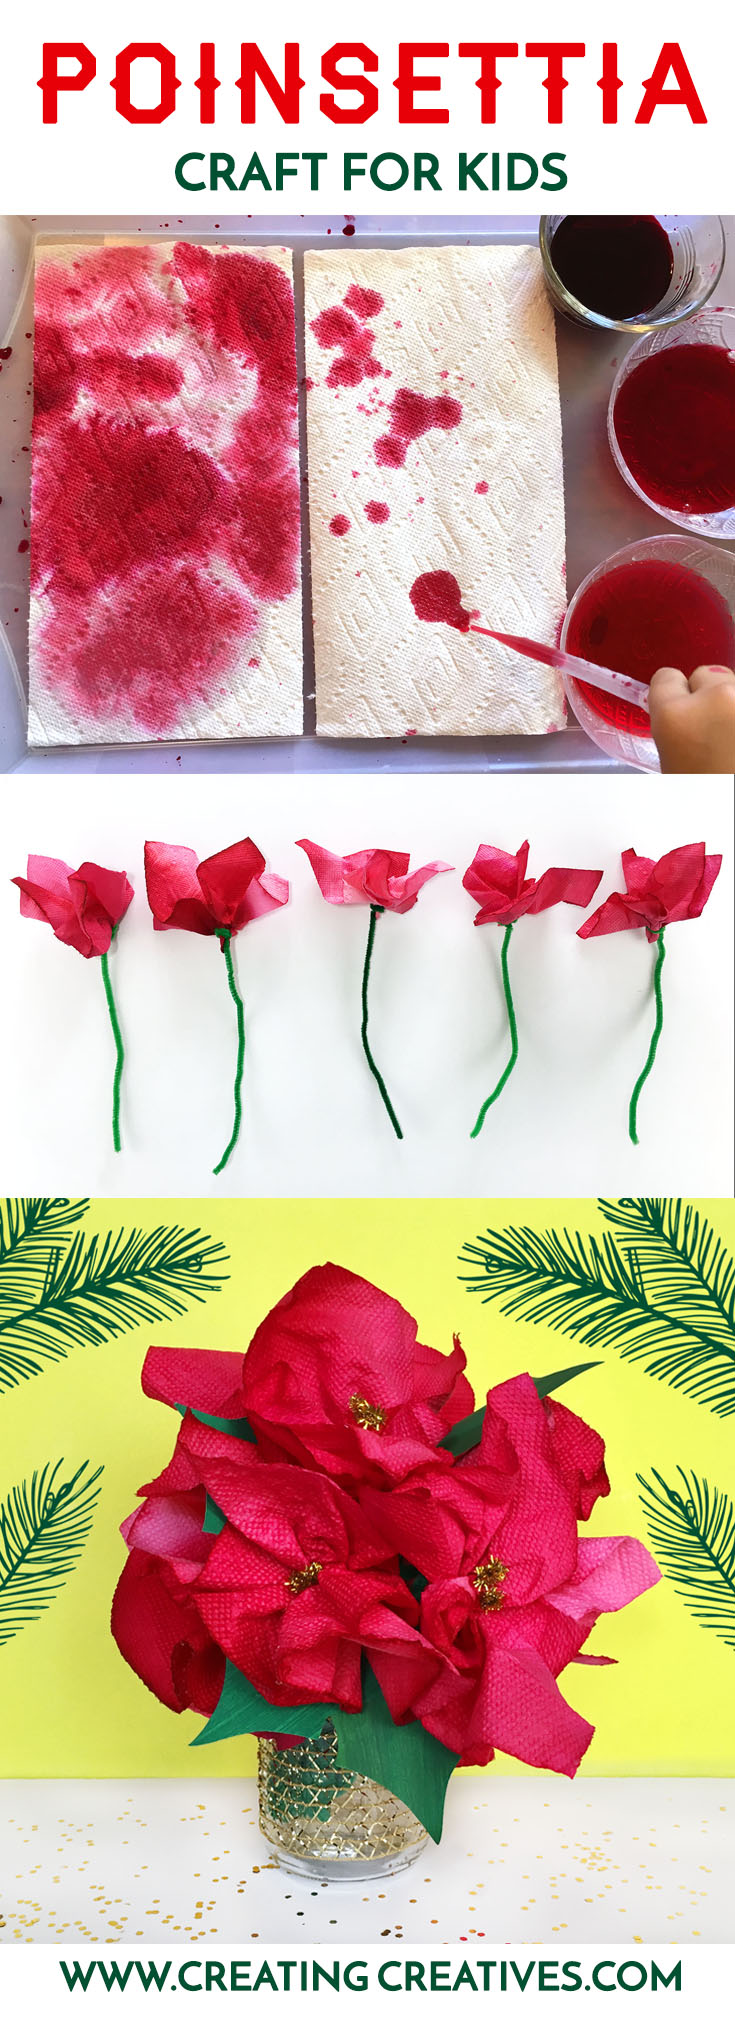
Before we begin you’ll want to set up a place for the painted paper towels to dry. This can be on other trays, or on a rolled out piece of kraft paper. Your little ones will paint them quite fast so having somewhere to put them is super helpful.
Make It – Poinsettia Craft – The Flowers:
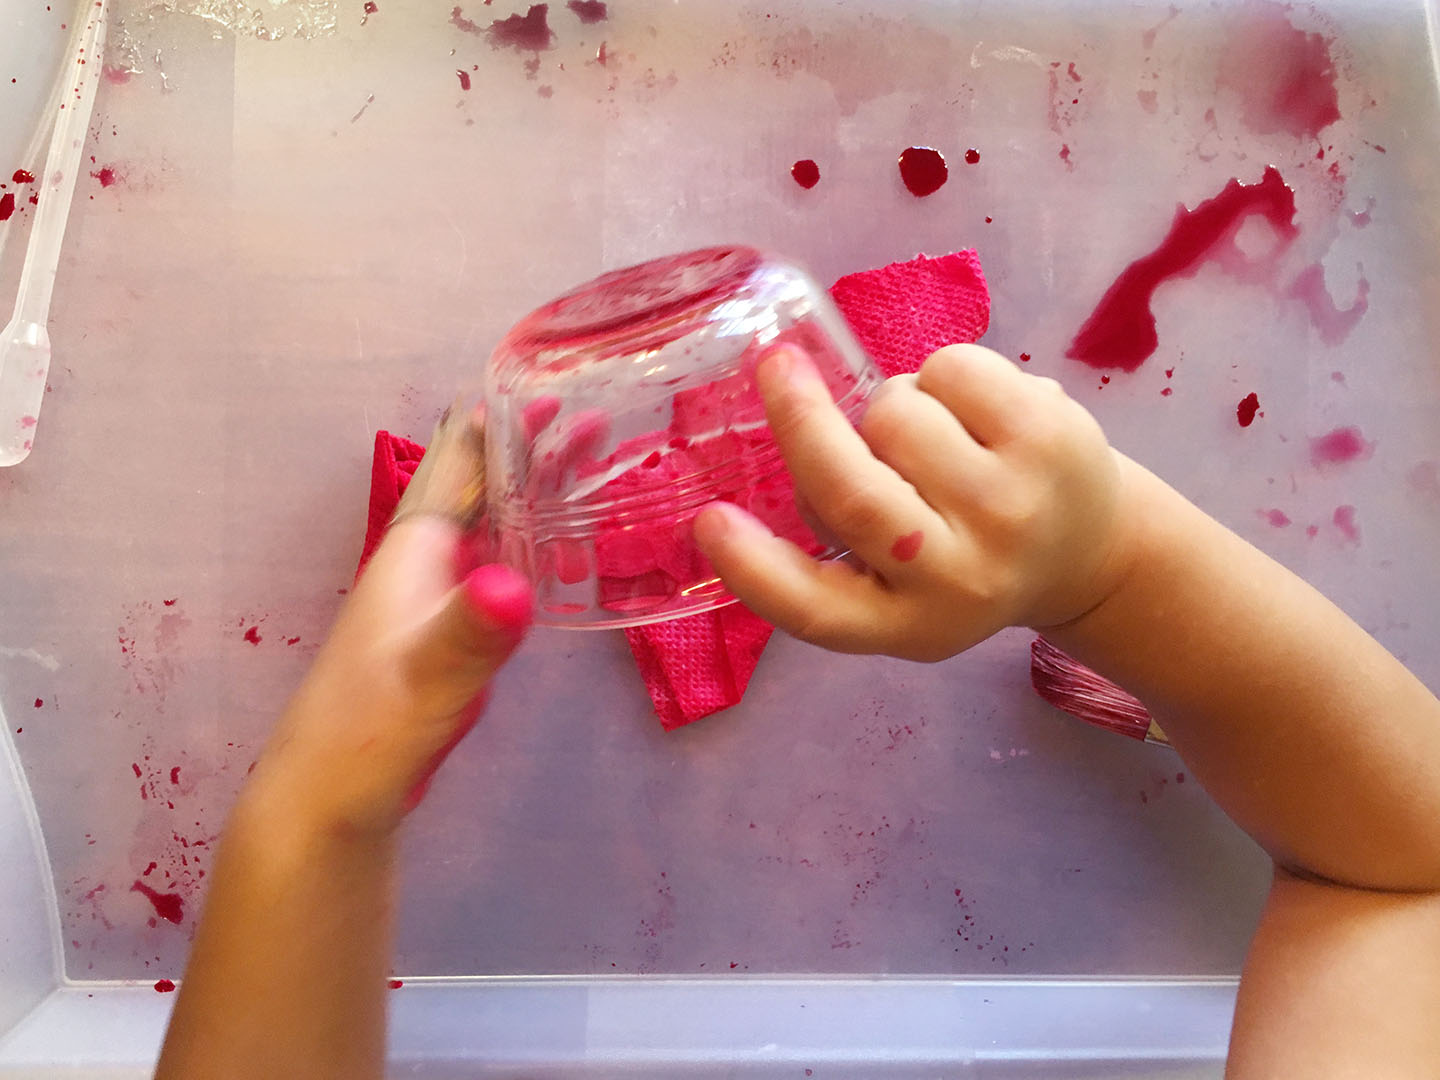
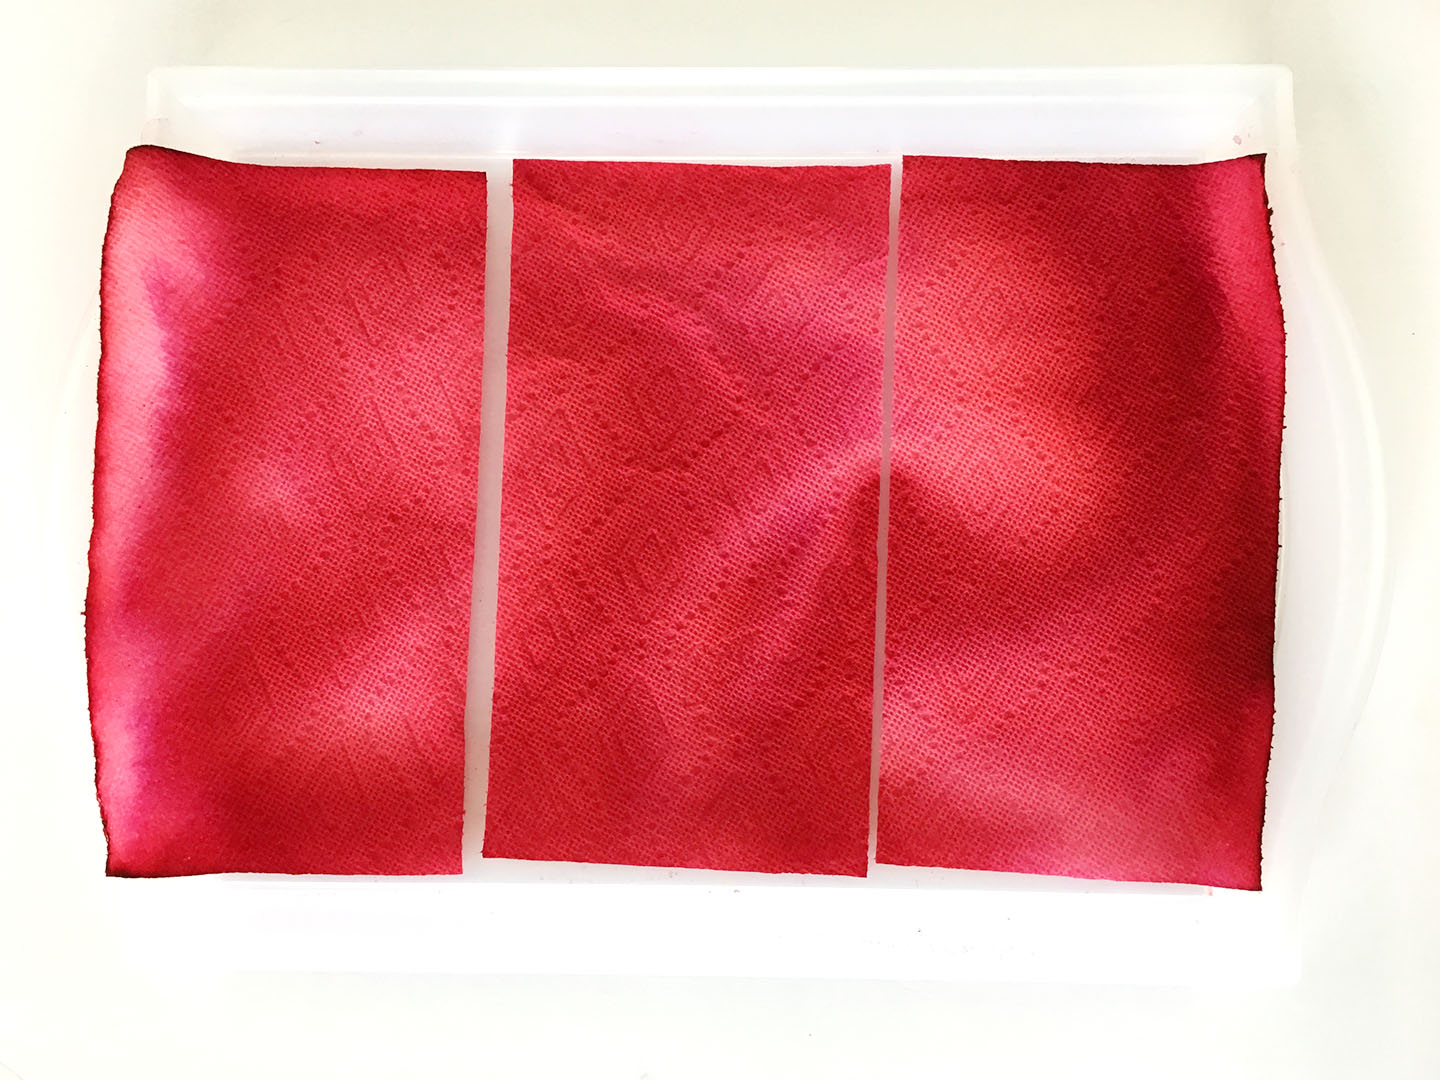
1. Set up the invitation to paint! On a tray lay out 1 or 2 sheets of paper towel, the liquid water color and a pipette for each color . We used red liquid water colors in 3 different dilutions. The top one, wasn’t diluted at all, and the bottom one is the most diluted.
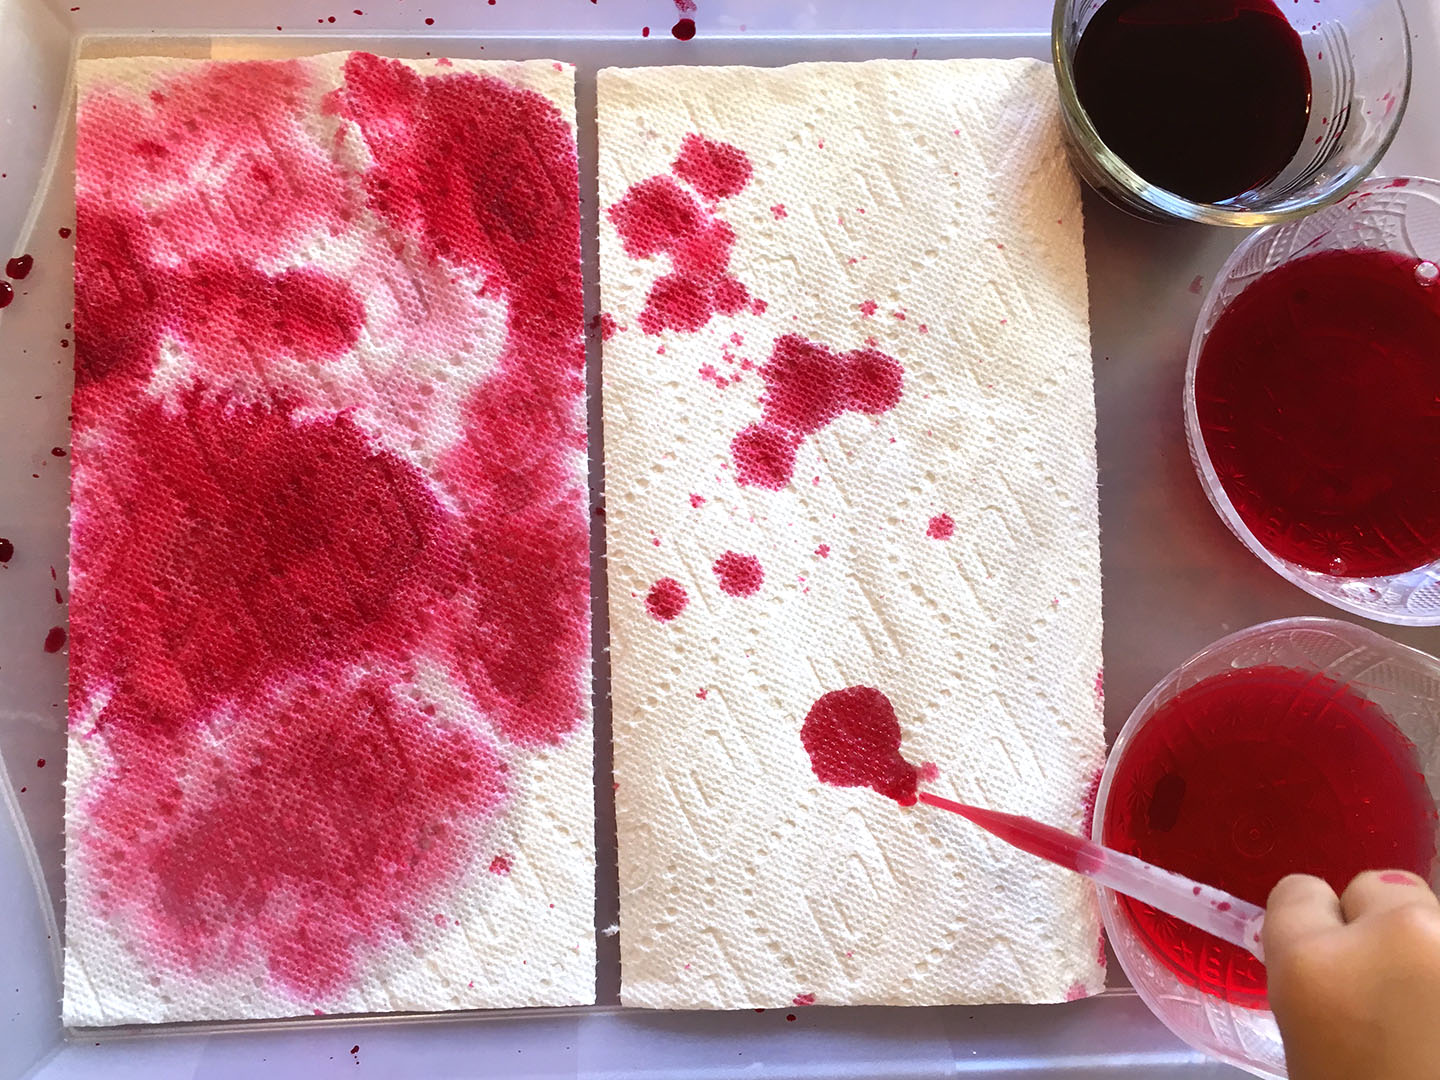
2. If you don’t have pipettes paint brushes work just as well. In fact, we used paint brushes after the pipettes since my 3 yr old just loves to paint. As you can see below my son decided to dump out the remaining drops of watercolor, but hey we got a really rich color!
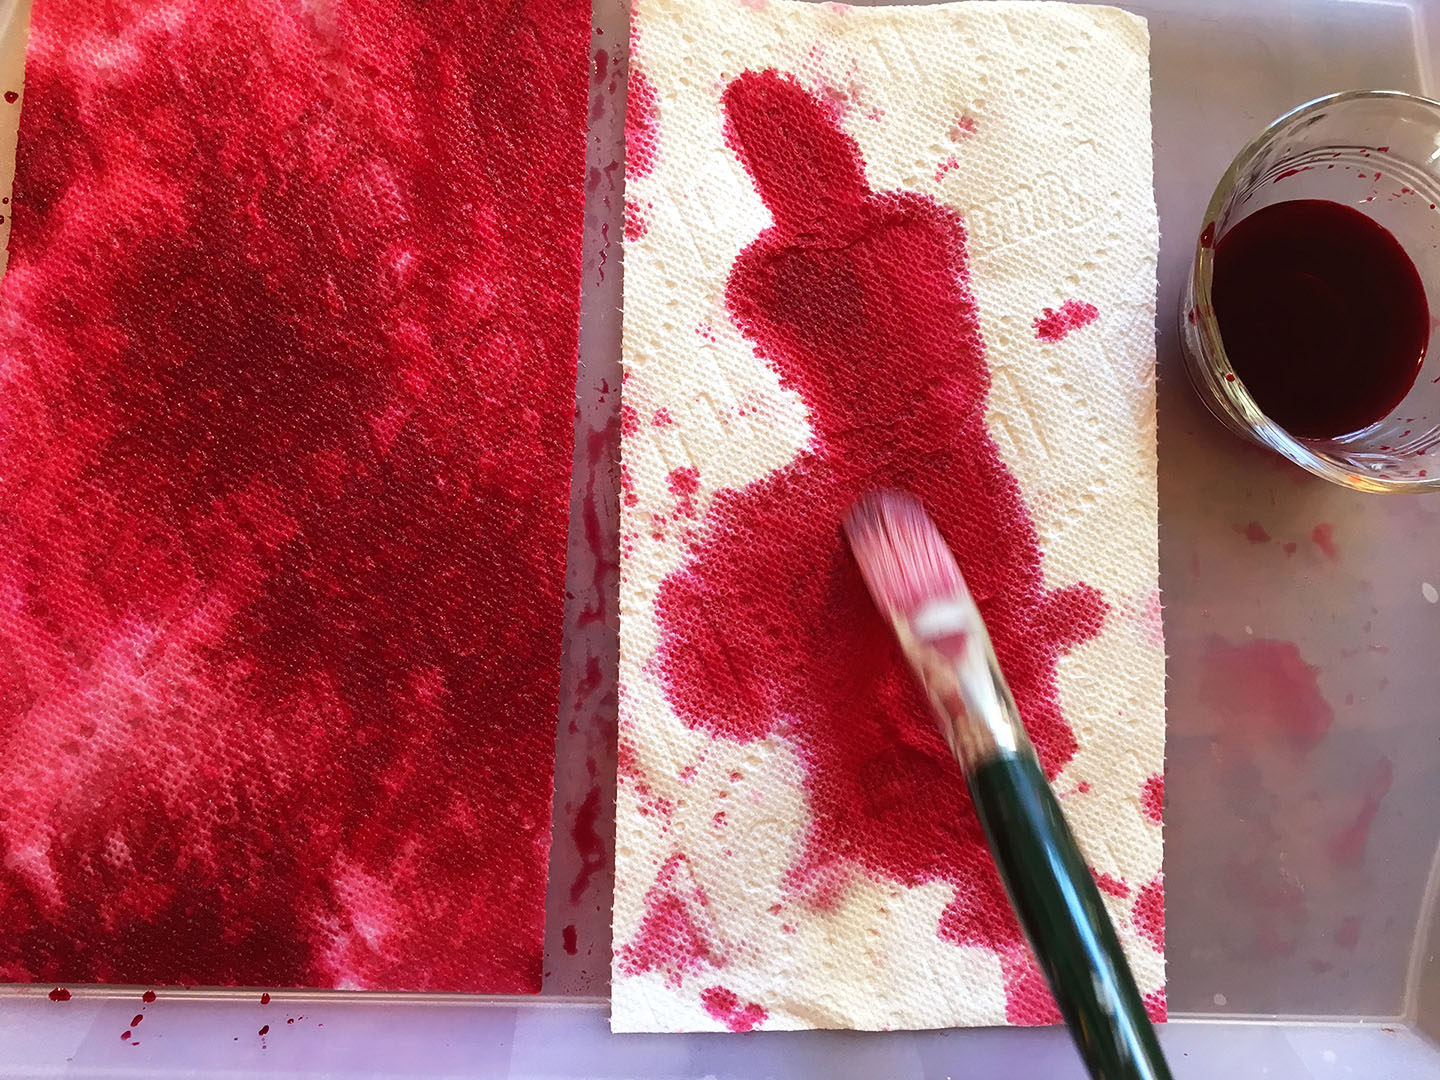
3. Let dry in a warm place.
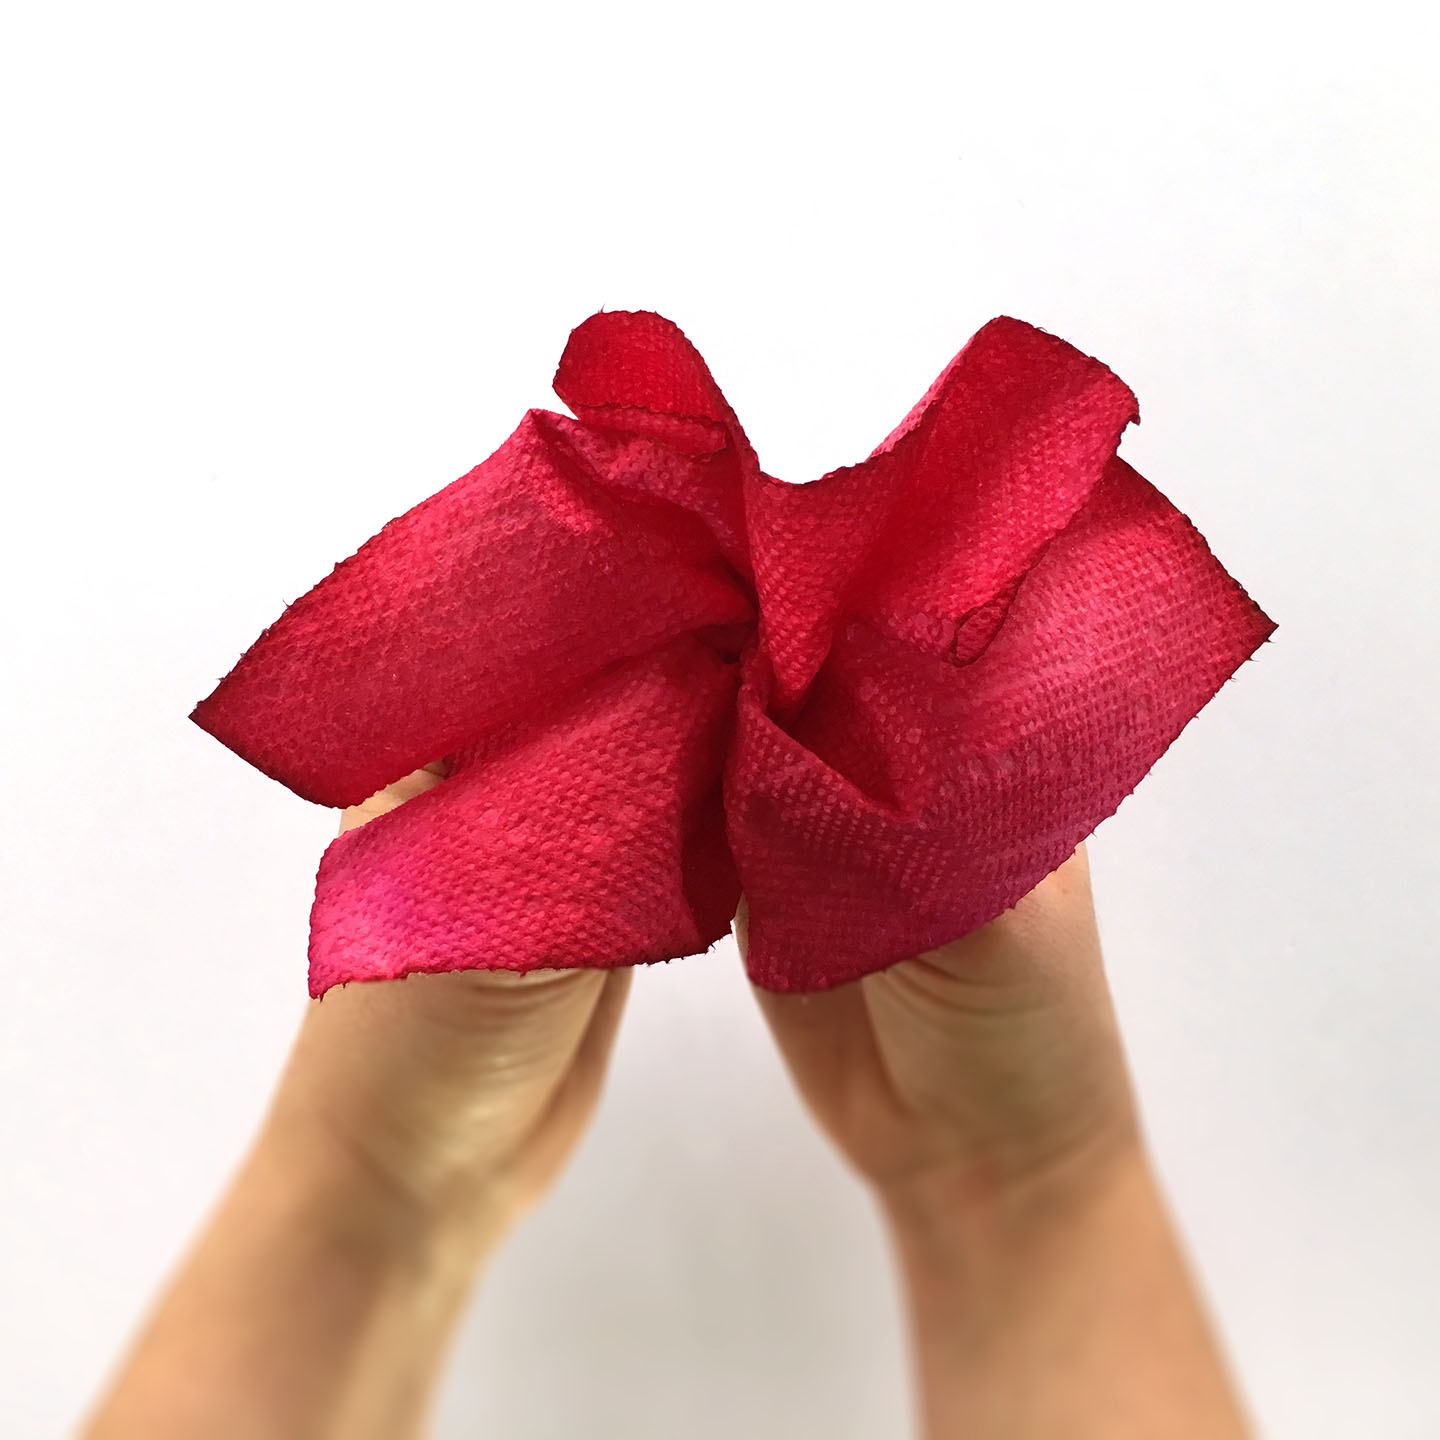
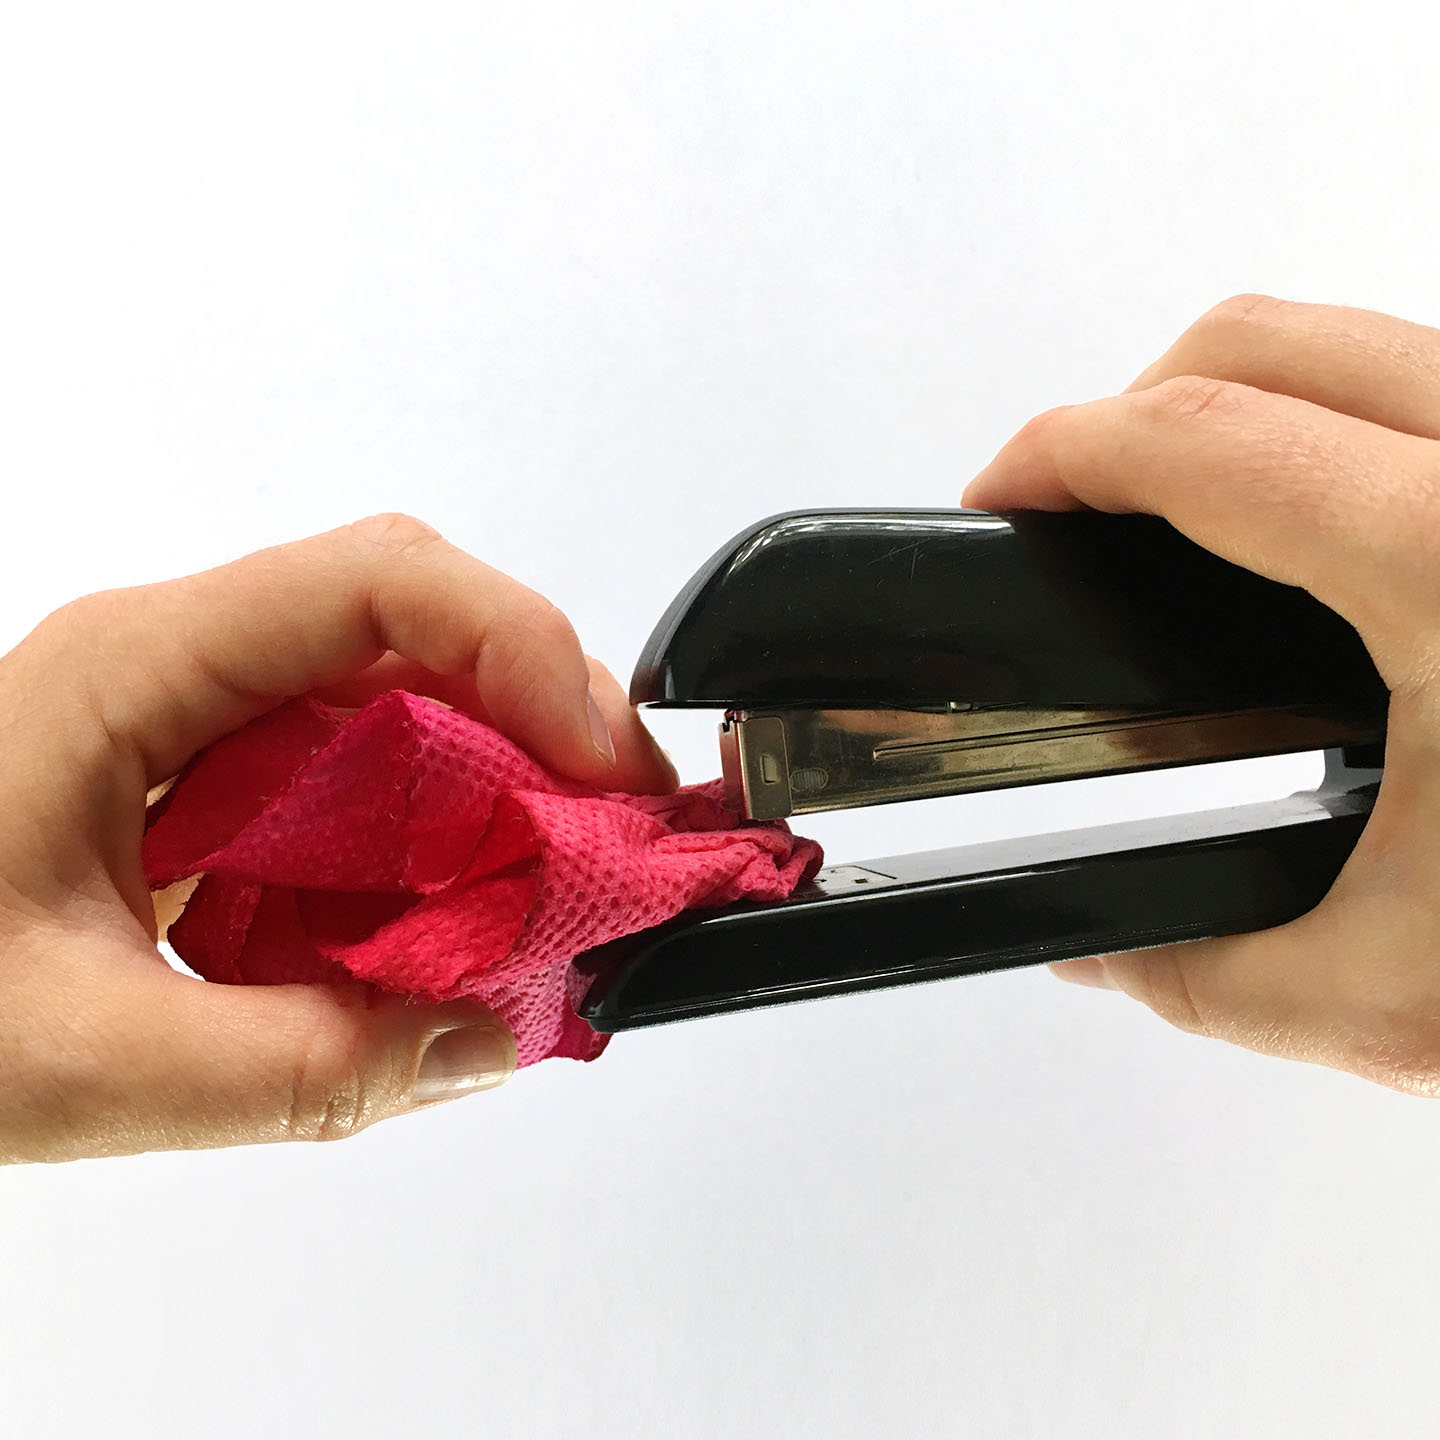
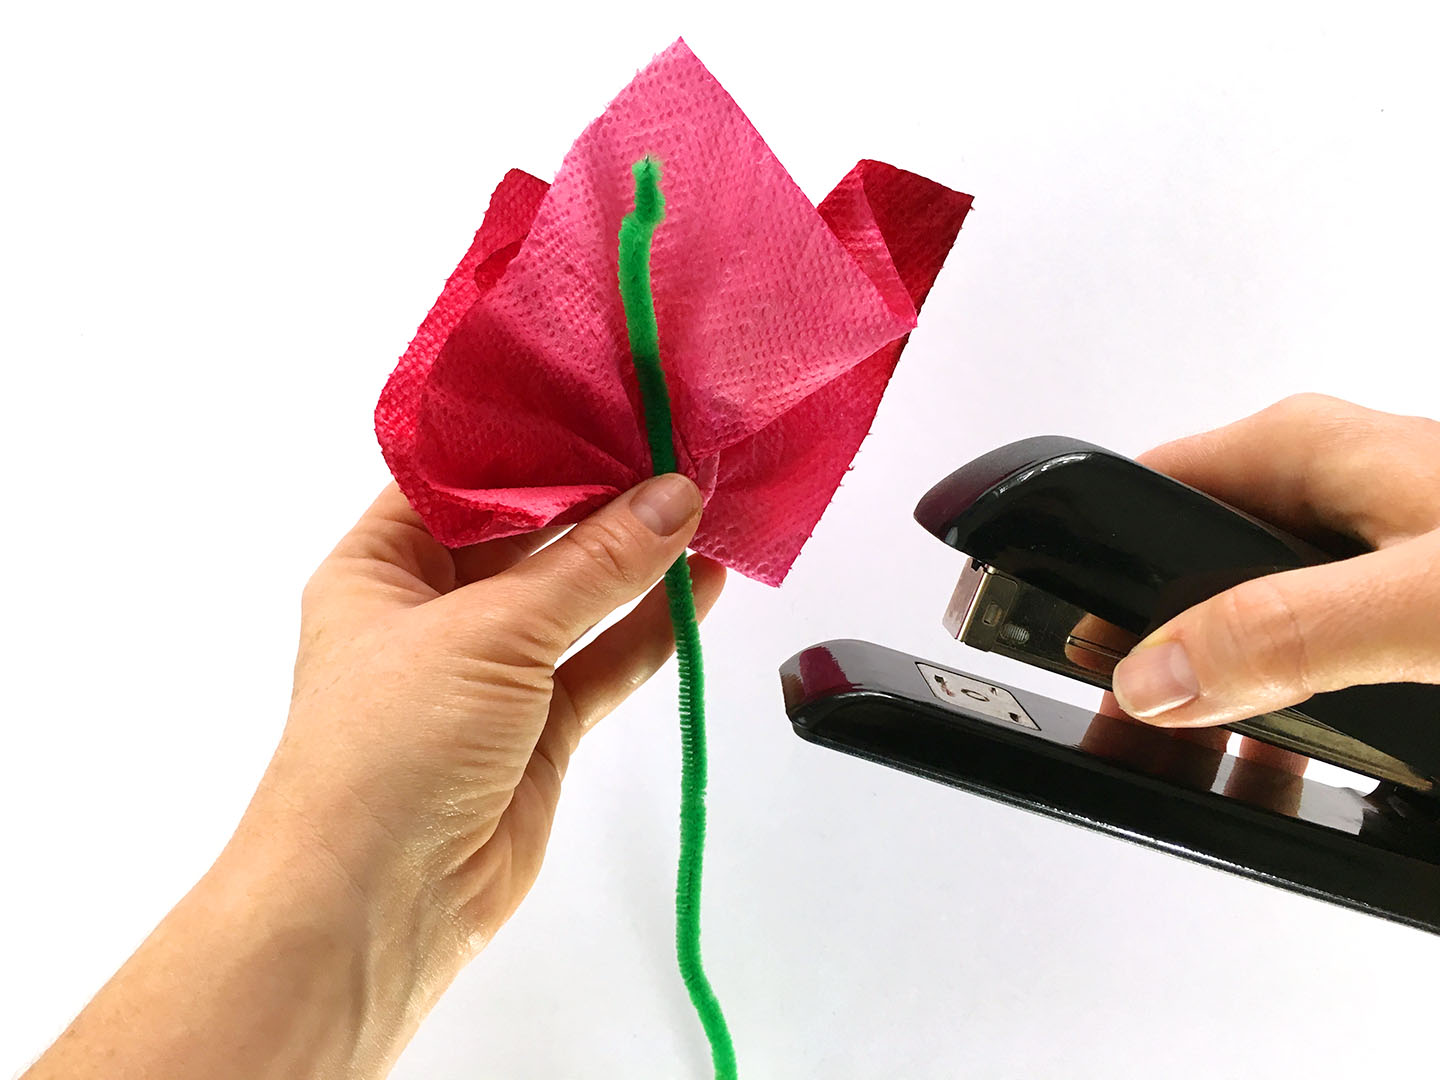
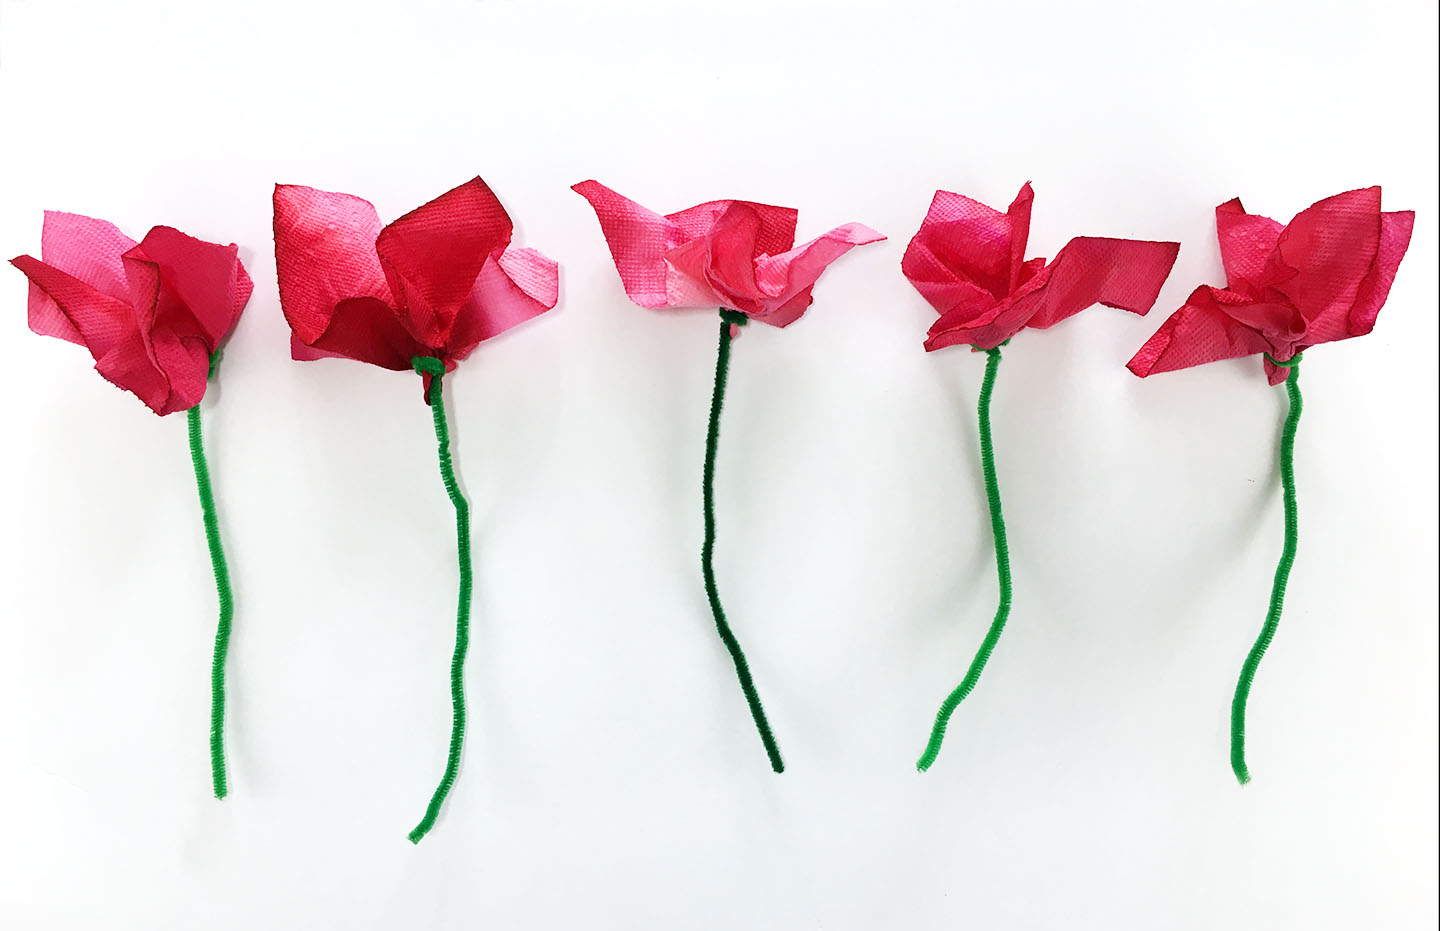
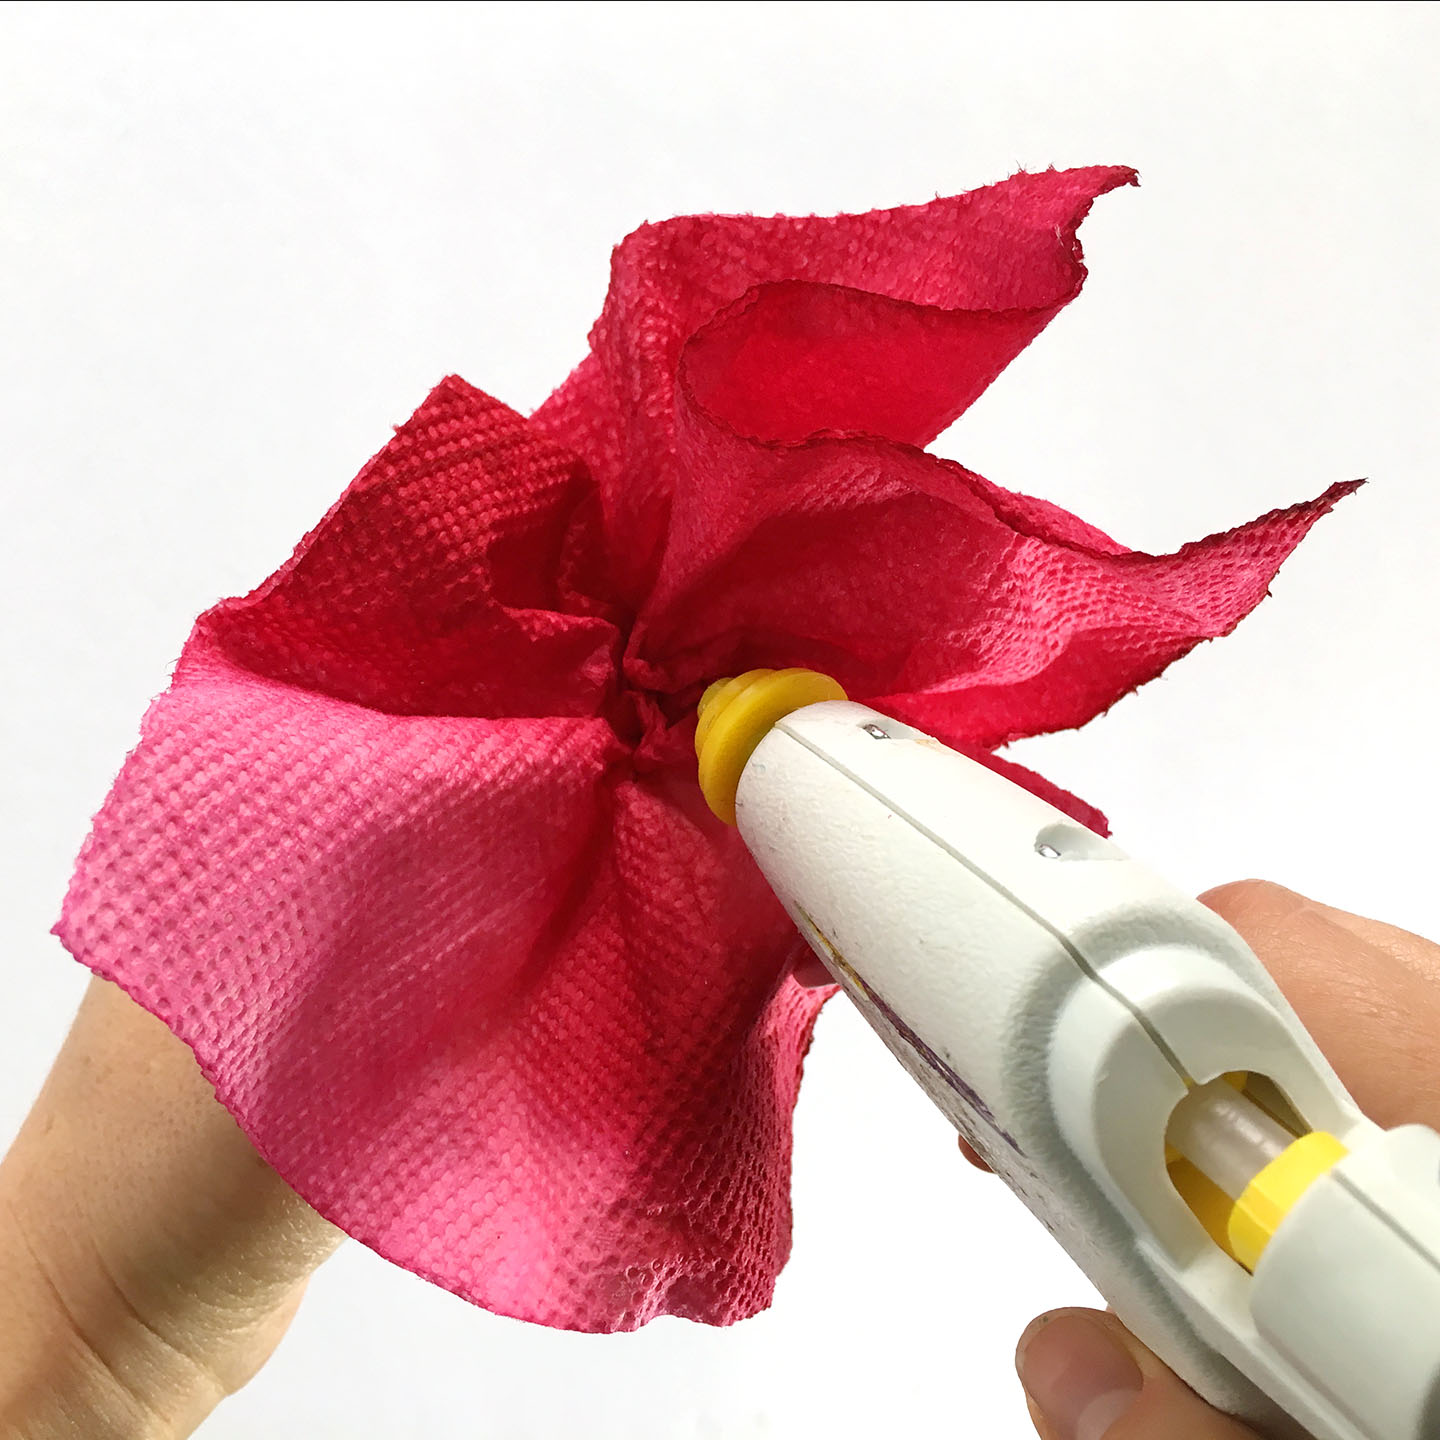
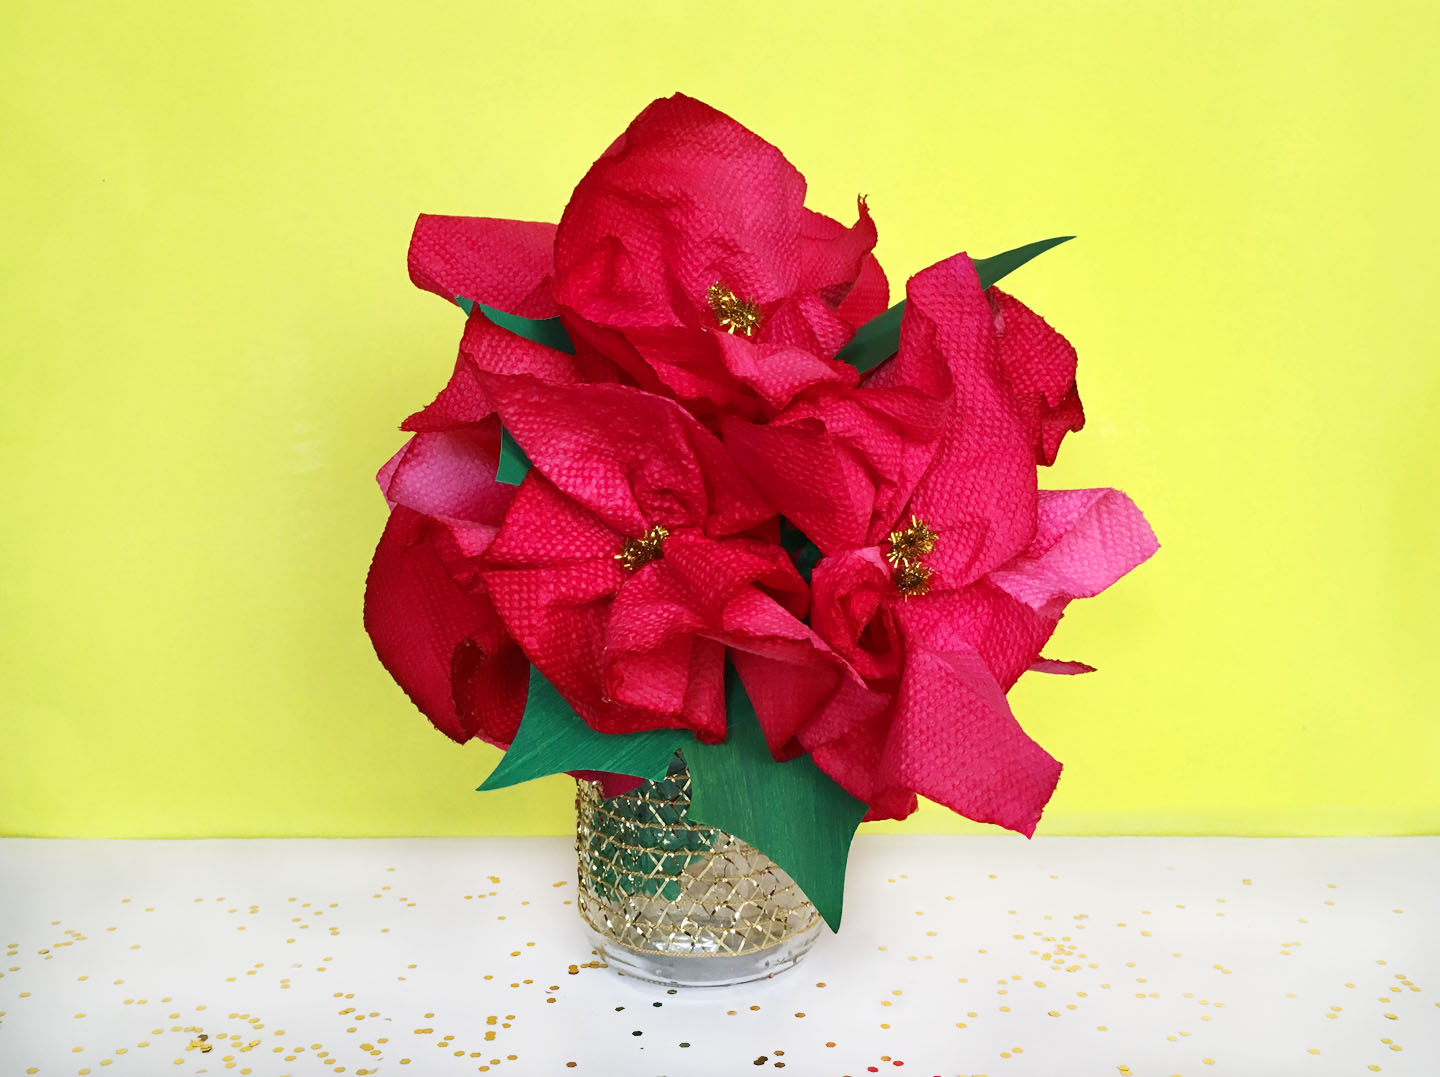
4. Now its adult or big kid time. Take your fully dried paper towels and scrunch them up to look like a flower. Once you’re happy with the shape staple it at the bottom. Do this for as many flowers as you’d like in your bouquet, we used 9 for ours.

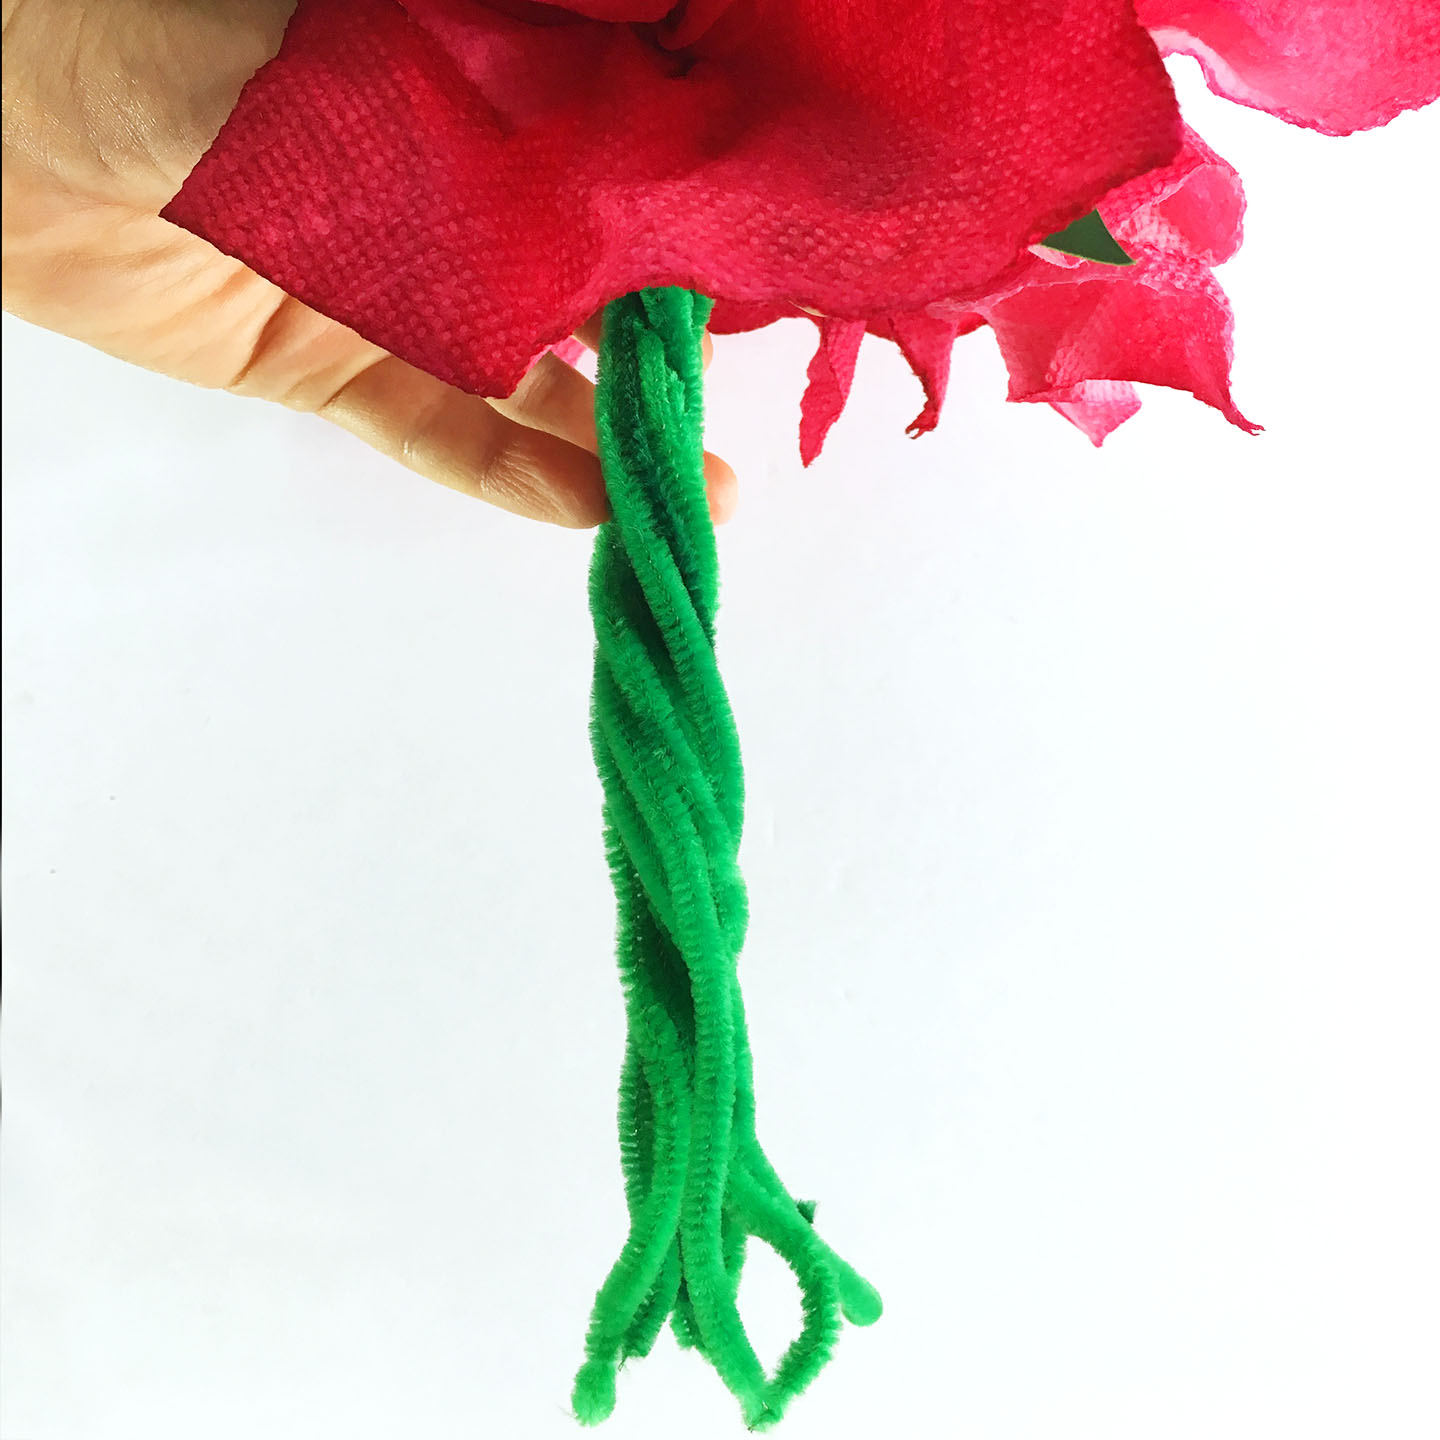
5. Once you’ve stapled all the flowers it’s time to add their stems. Staple a green pipe cleaner at the base of your flower leaving an inch or two at the top. Then take this extra pipe cleaner at the top and wrap it around the base of the flower to secure it in place.
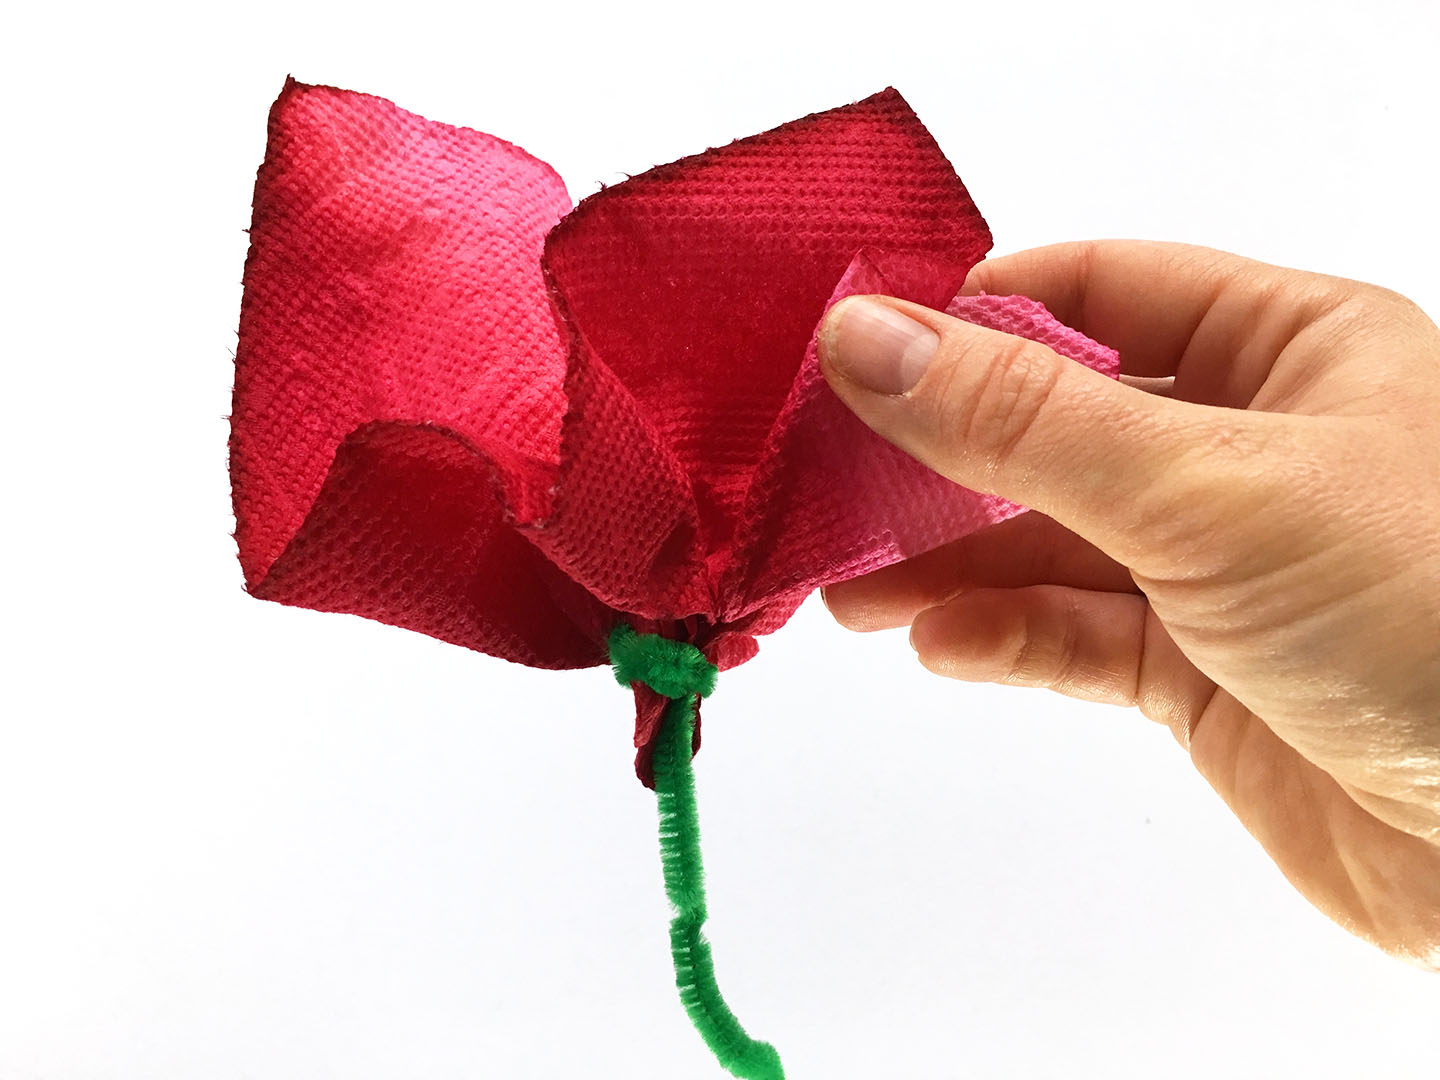
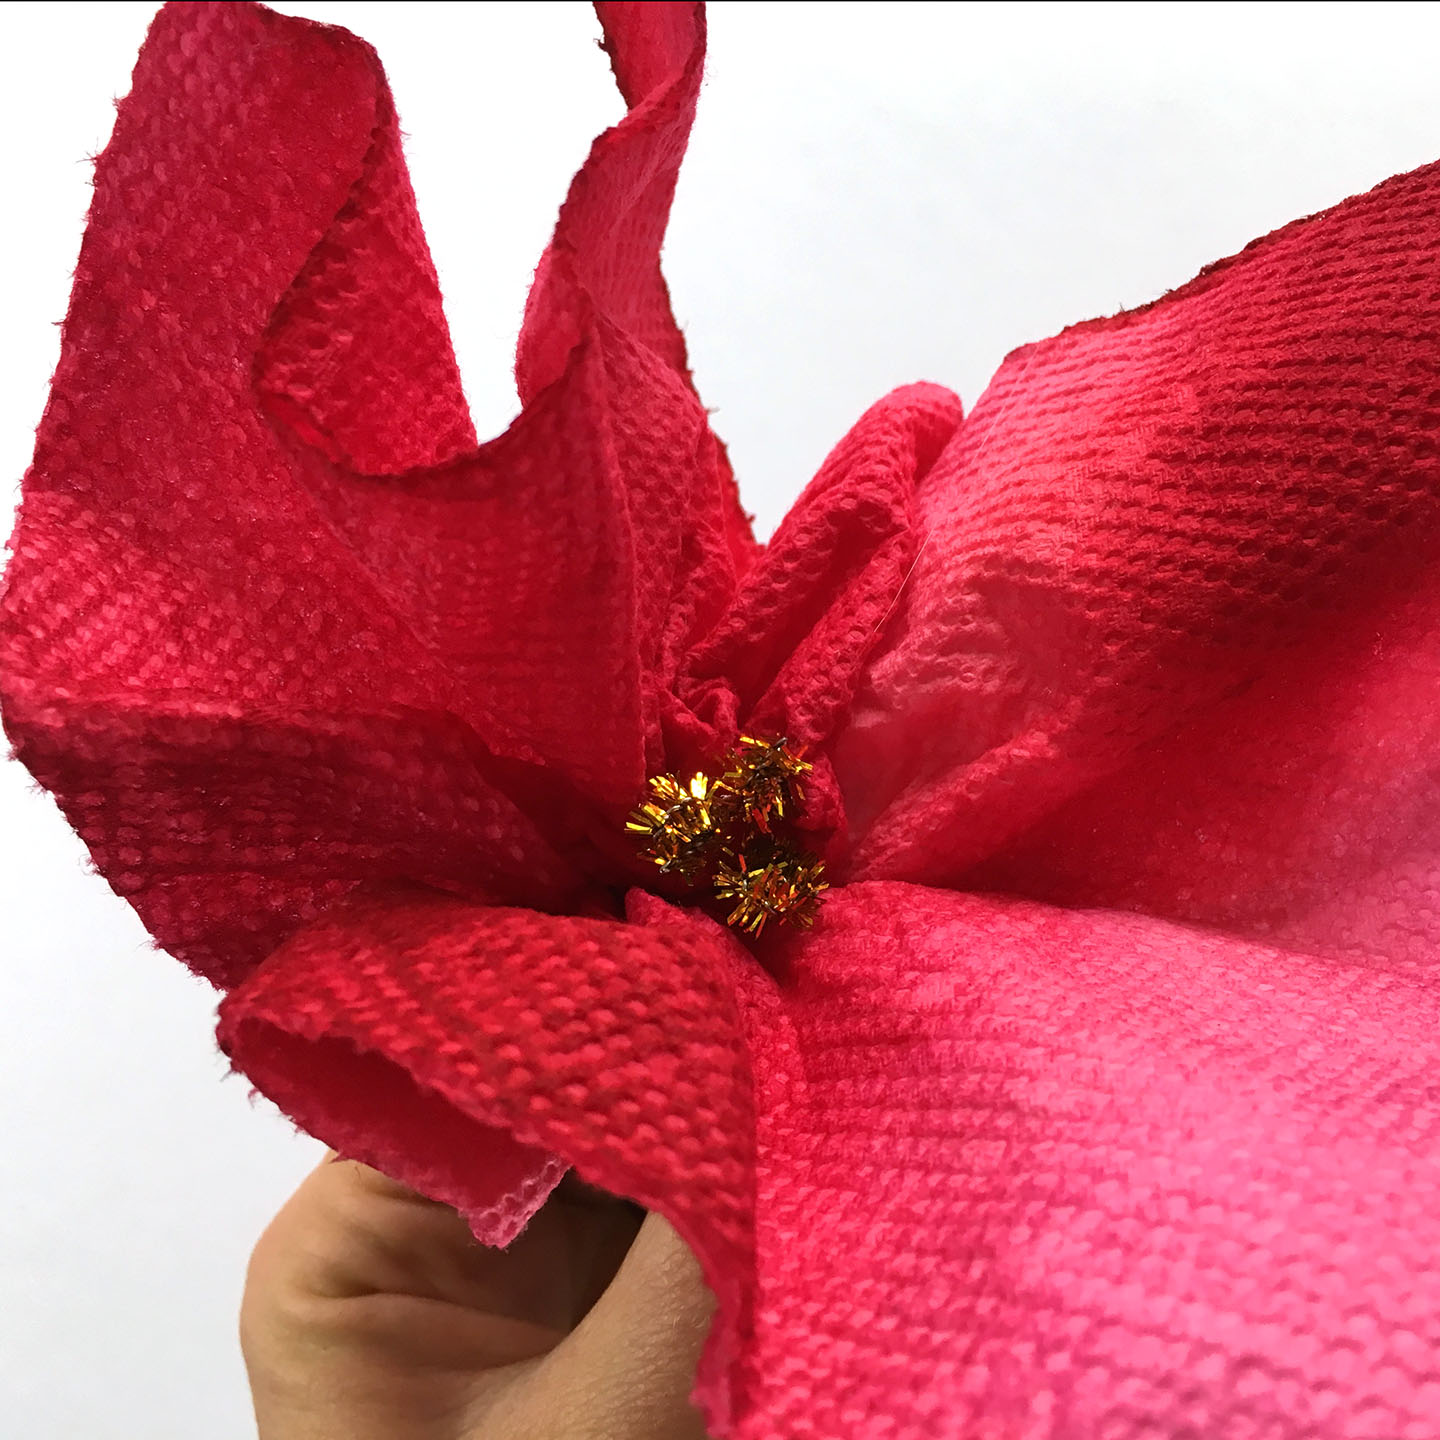
6. You’re beautiful flowers should now look something like this.
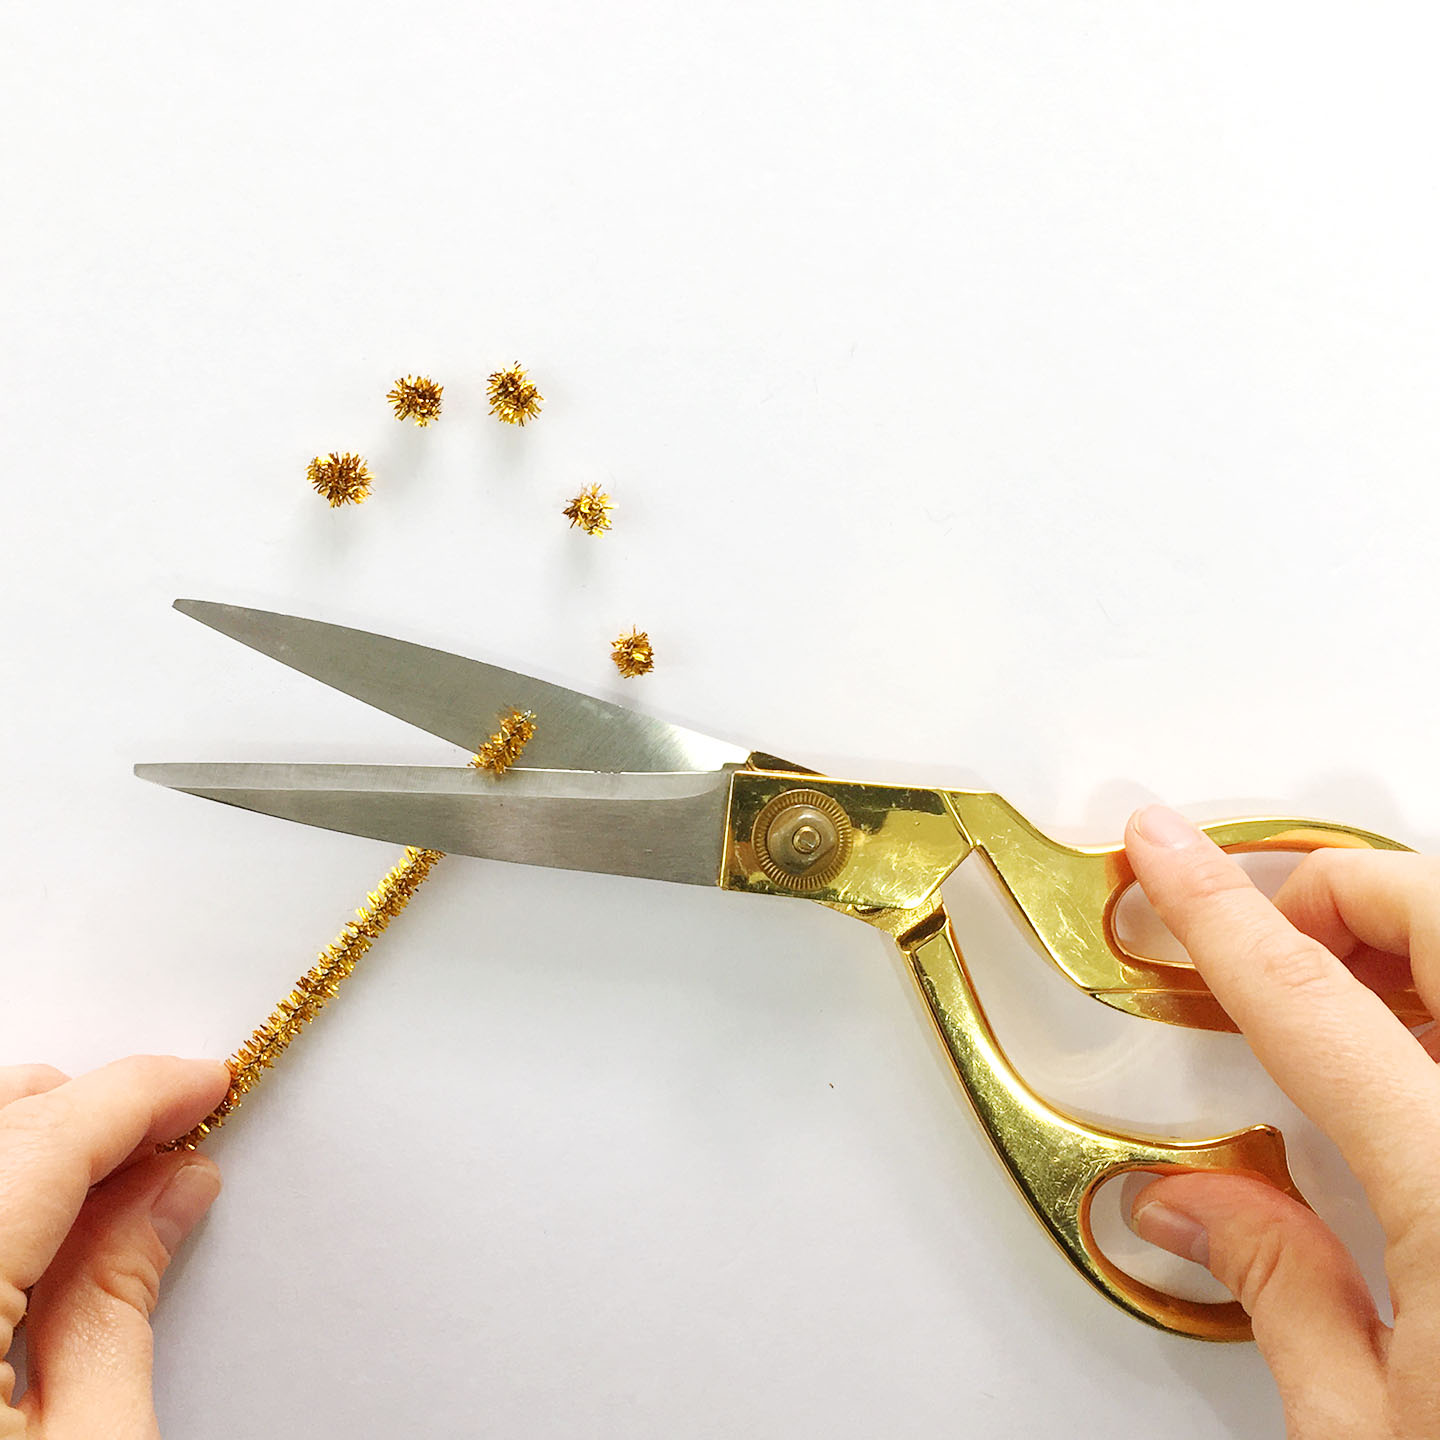
7. To make the pretty inside, which is the actual flower of a poinsettia, we’re going to use gold pipe cleaner, because ADOS (Attention Deficit Oooo Sparkly!). Cut your pipe cleaner into little sections, about an inch long, then roll into a little pom pom ball. Put a couple drops of hot glue, one per pom pom, in the middle of your flower and stick on the pom poms. It’s fine if you stick them to the side of the leaves too, as long as it’s in the middle.
Make It – Poinsettia Craft For Kids – The Leaves:
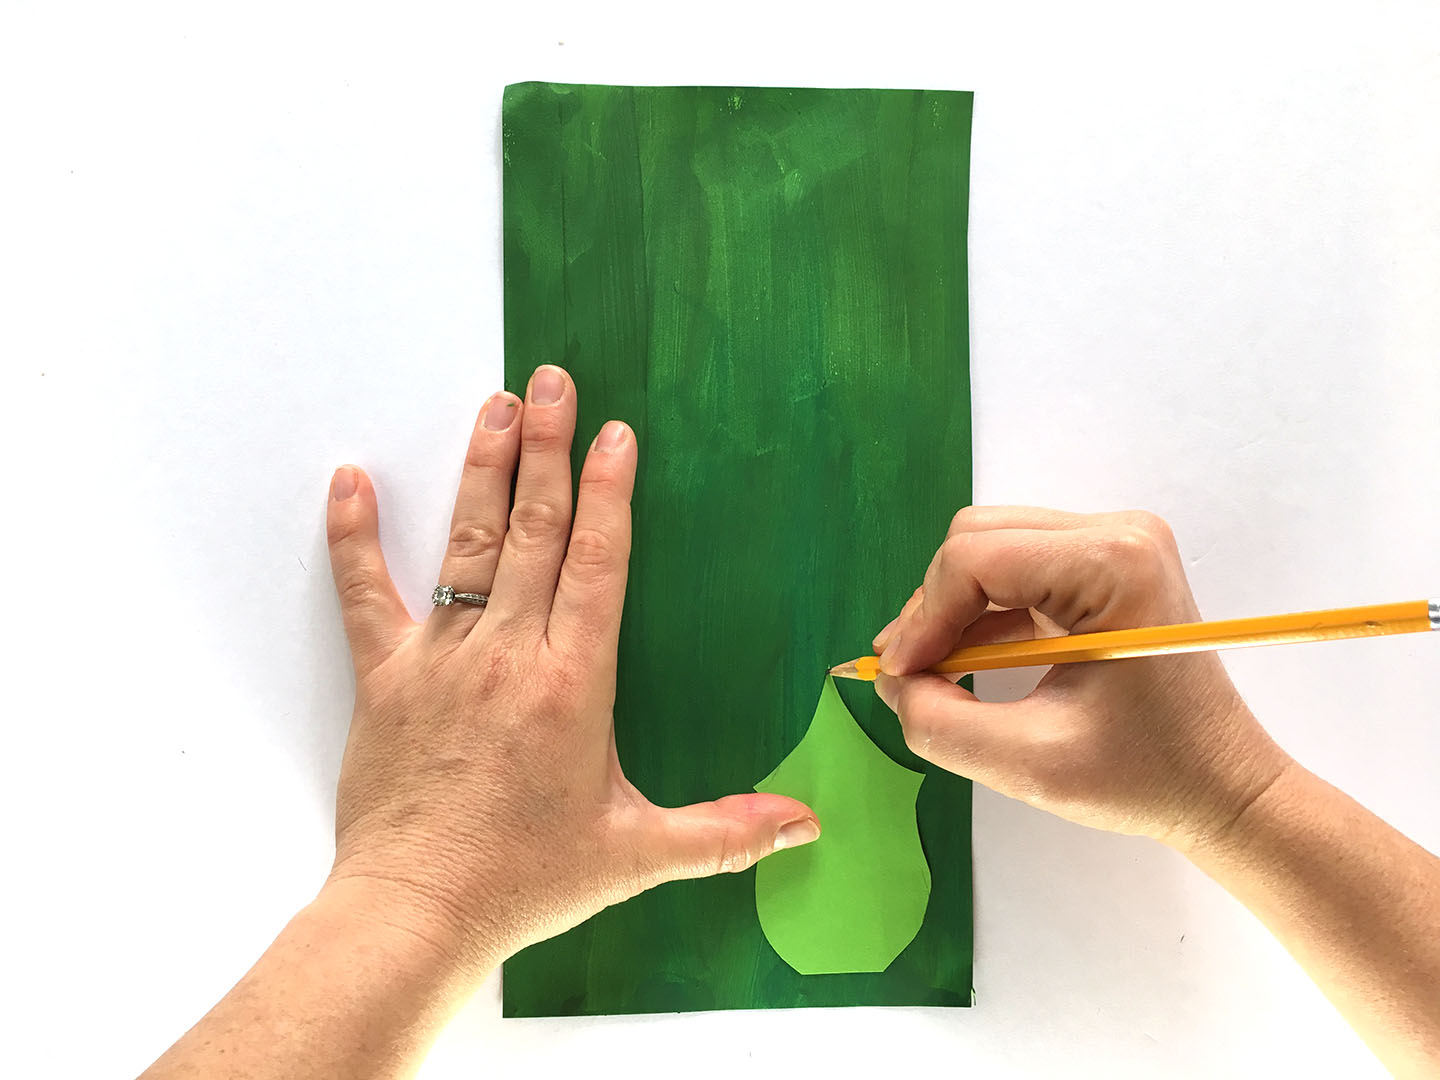
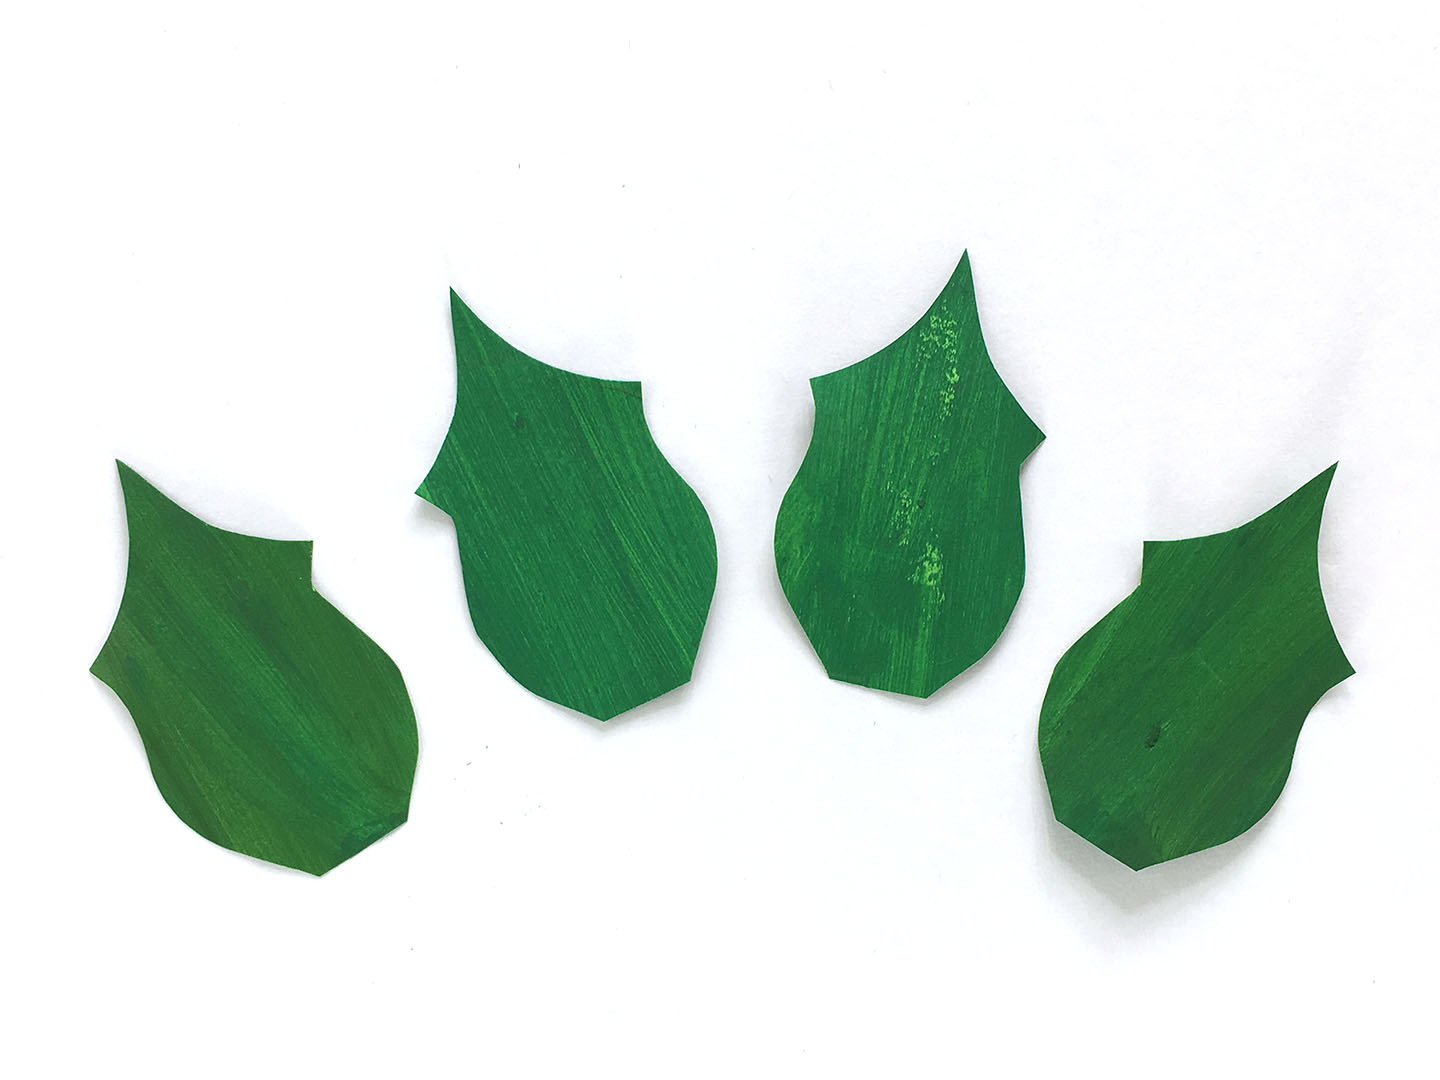
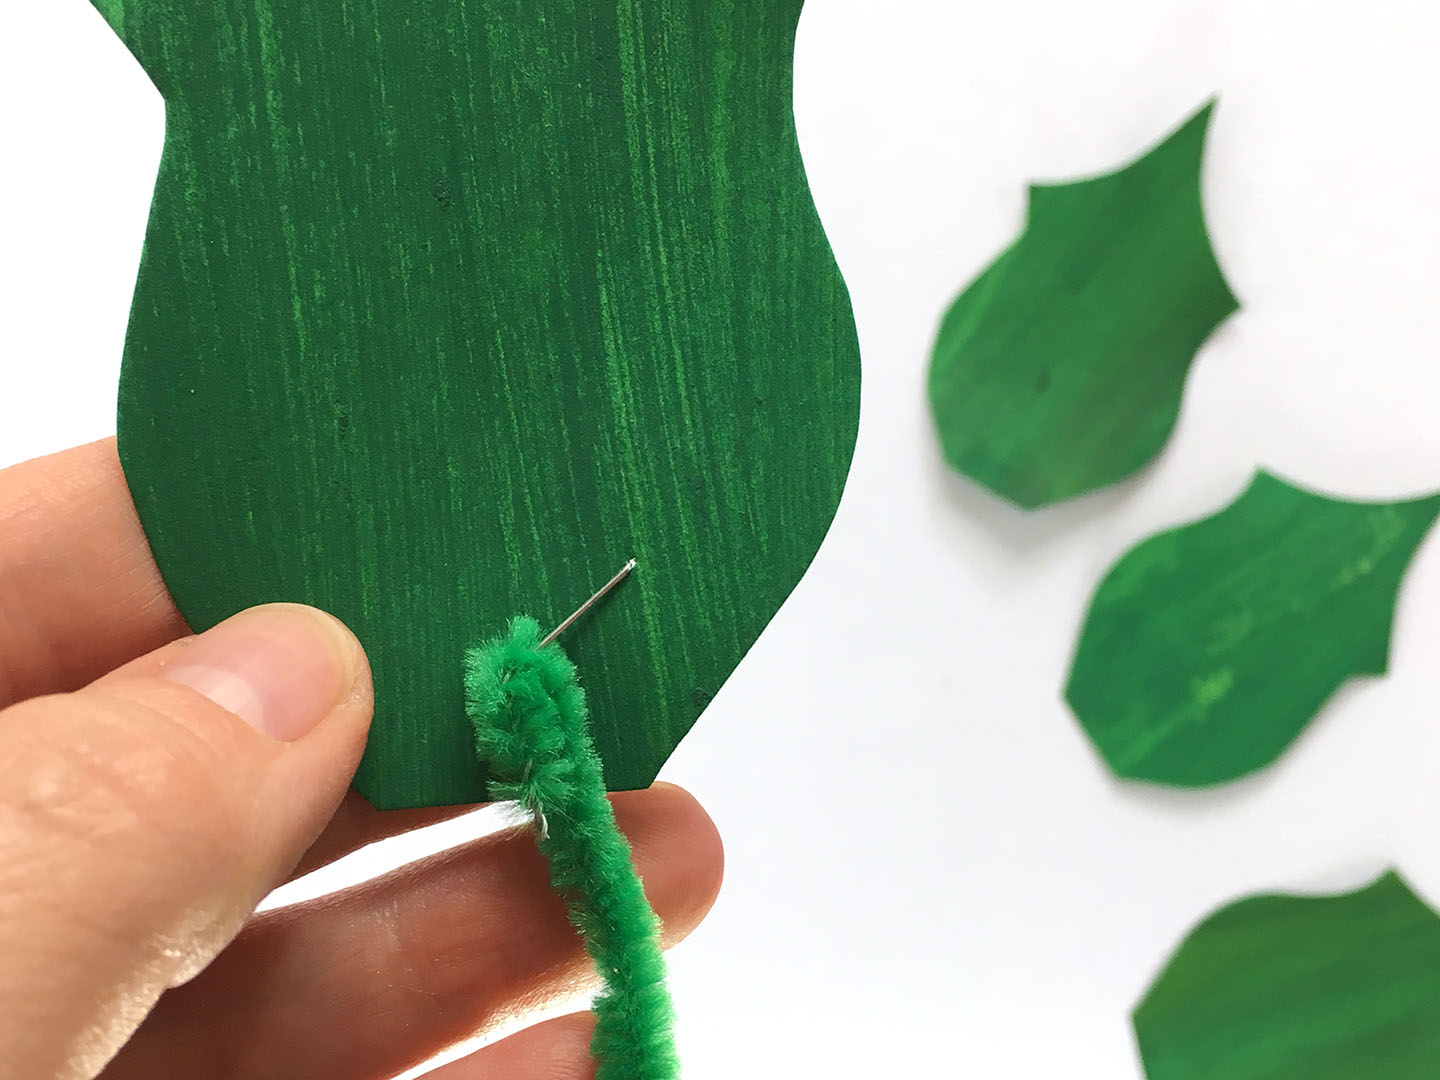
1. Now it’s leaf time! If you want more painting time for your little one have them paint a piece of watercolor paper green. We like watercolor paper for this because it’s a bit thicker than normal paper, but normal paper will work fine too. If you don’t want to paint you can use a piece of green paper. Print your leaf template and trace it onto the green paper, then cut out.
2. Staple a green pipe cleaner to the bottom of the leaf and fold the pipe cleaner over to somewhat secure it. These will be a little wobbly, but once in the bunch of flowers they’re more secure and you can easily position them to look pretty in your bouquet.
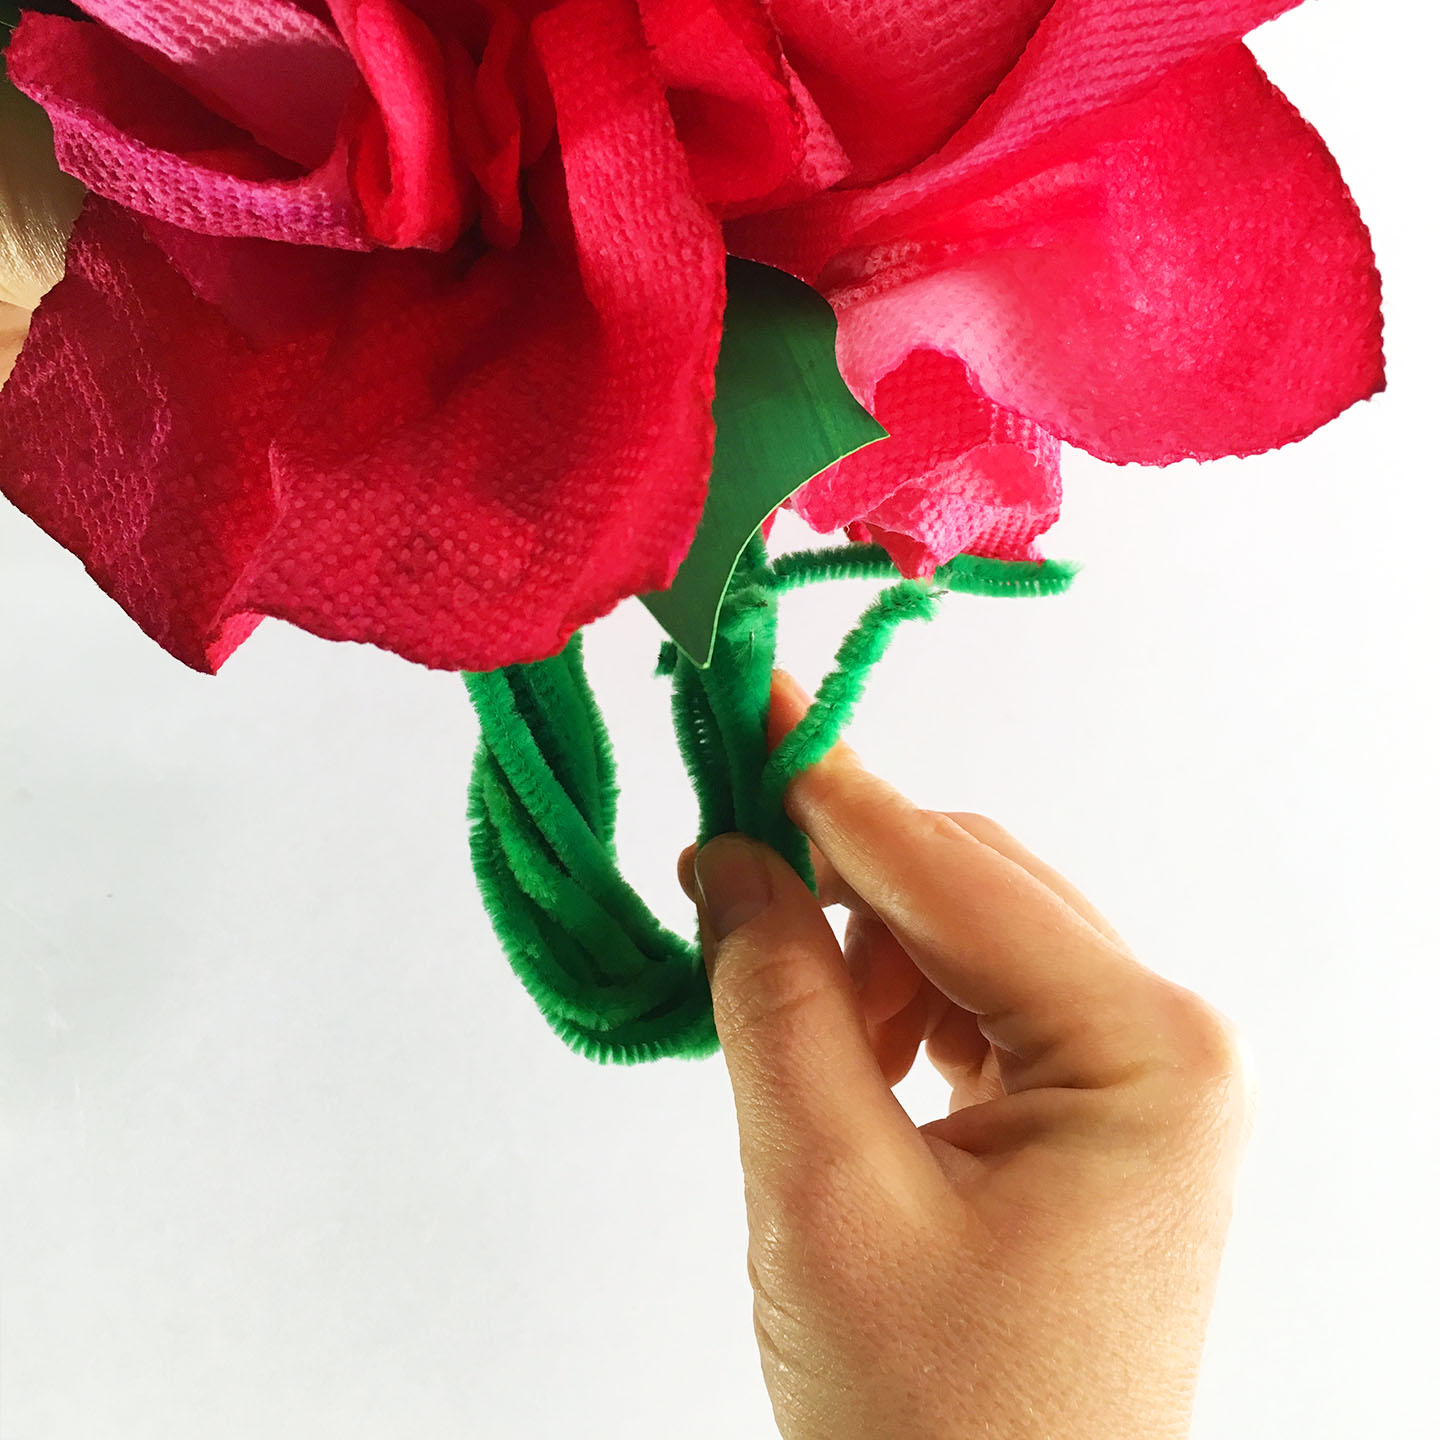
3. Put your bouquet together mixing the leaves in between the flowers and once you’re happy with the placement twist all the stems together at the bottom, then fold them up and stick in an empty jam jar or vase.
4. Display!
Share Your Poinsettia Craft:
Spread the word and Pin and Facebook share with your friends!
For More Christmas Projects Check These Out:
Scraping Paint Christmas Garland

Free Christmas Ornament Guide

Pingback: 47 Creative Watercolor Painting Ideas Kids Will Love | Projects with Kids
Pingback: URL